
Pre-requisites Checklist (Before You Start)
To set up the WhatsApp Cloud API smoothly, make sure you have these ready before creating your Meta app:
-
Facebook Business Manager (Business Portfolio) access for your organization.
-
A valid phone number that is not currently used on a personal WhatsApp account.
-
Your website URL (used in app details, webhooks, and verification steps).
-
Meta Developer Account (developers.facebook.com) with profile verification completed.
Installing NXT Cloud Chat Plugin
Install via WordPress Dashboard
- Log in to your WordPress admin
- Go to Plugins → Add New
- Click Upload Plugin
- Select
nxt-cloud-chat.zip - Click Install Now
- Activate the plugin
Creating and Setting Up the WhatsApp Cloud API App (Meta Developer Platform)
In this section you will create a Meta app, attach the WhatsApp product, add a WhatsApp Business phone number, and enable API access.
Create a Meta Developer Account
- Visit: https://developers.facebook.com/
- Log in with your Facebook Account
- Accept the terms and complete profile verification
Create a New App
-
Go to My Apps → Create App

From the Meta Developer dashboard, click Create App to start a new integration. -
Click Create App
Choose the standard app creation flow (recommended for WhatsApp Cloud API). -
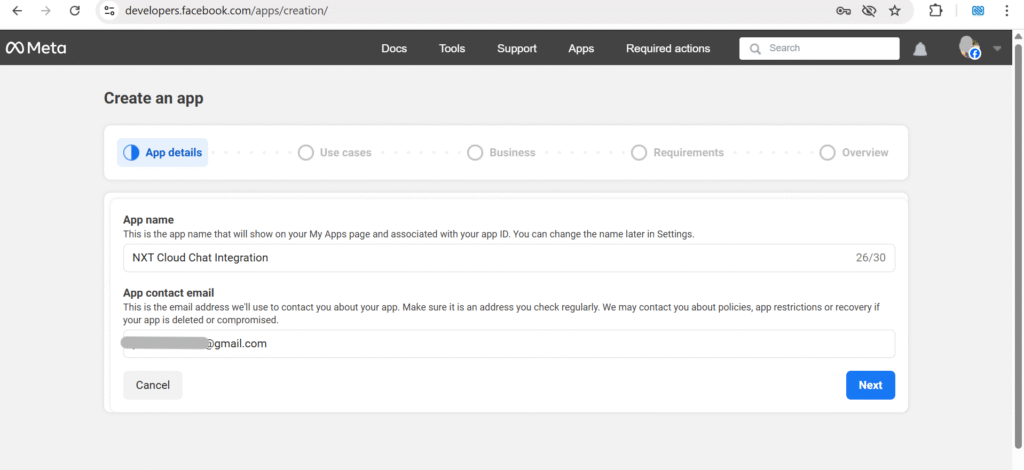
Enter your App Name and App Contact Email, then click Next.

Use a name you can recognize later, like NXT Cloud Chat Integration. -
Select Other and click Next
This keeps the setup simple and avoids unnecessary product presets. -
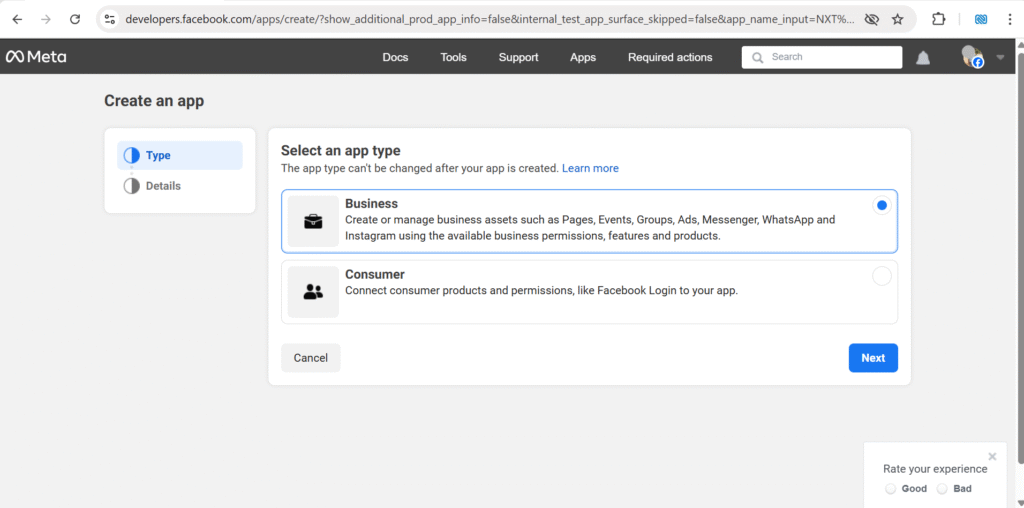
Select app type Business and click Next
WhatsApp Cloud API works under Business apps tied to your Business Portfolio. -
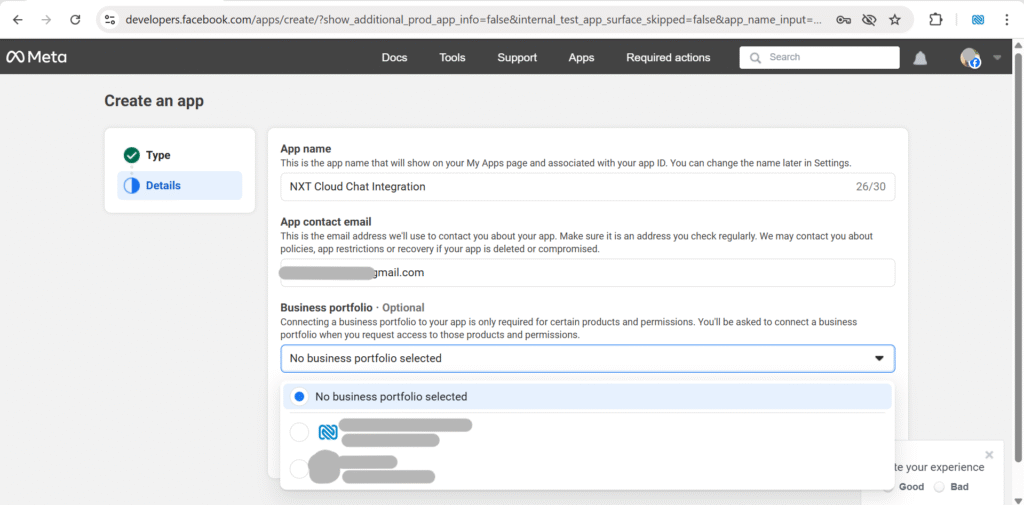
Choose your Business portfolio then click Create app
Select the correct portfolio where your WhatsApp Business Account should live. -
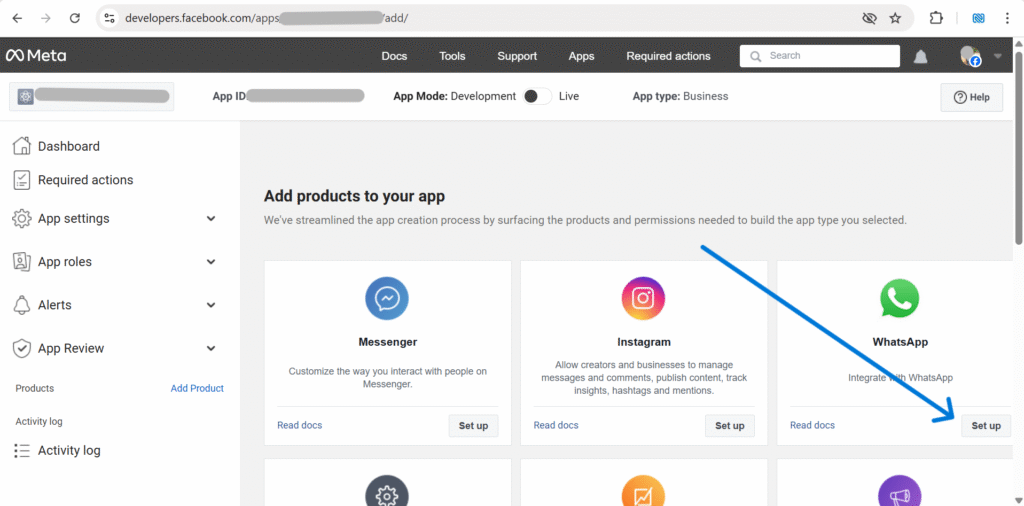
Add WhatsApp product: scroll to WhatsApp and click Set Up.
This enables WhatsApp Cloud API tools like phone number setup, tokens, and webhooks. -
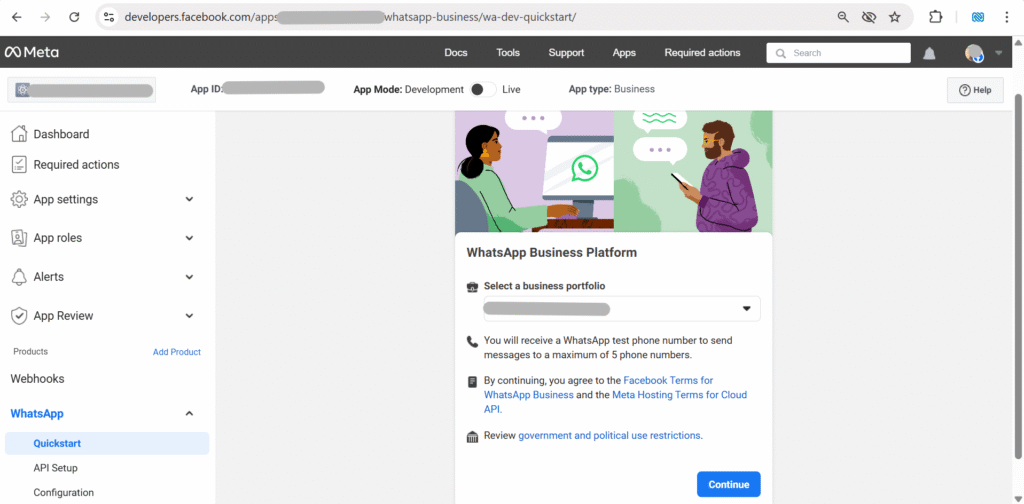
Open Quickstart under WhatsApp and click Start using the API.
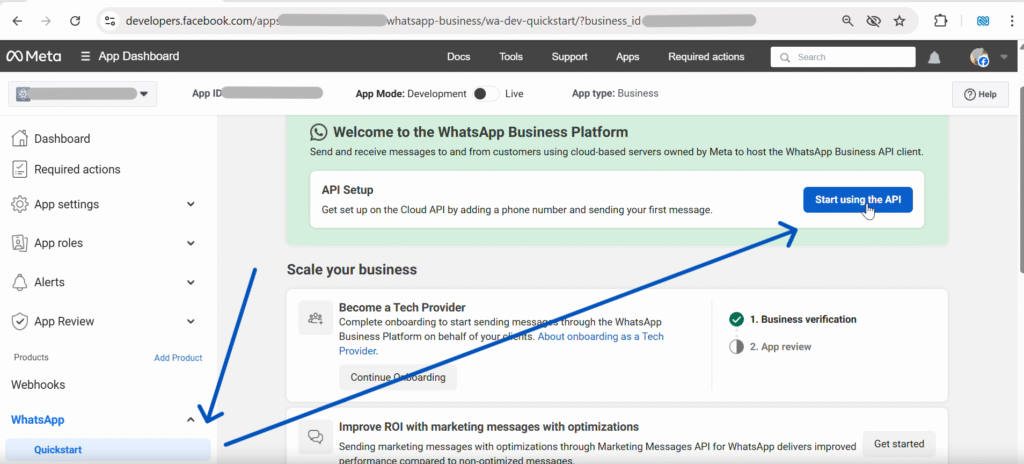
The Quickstart page helps you generate the first token and add a business phone number. -
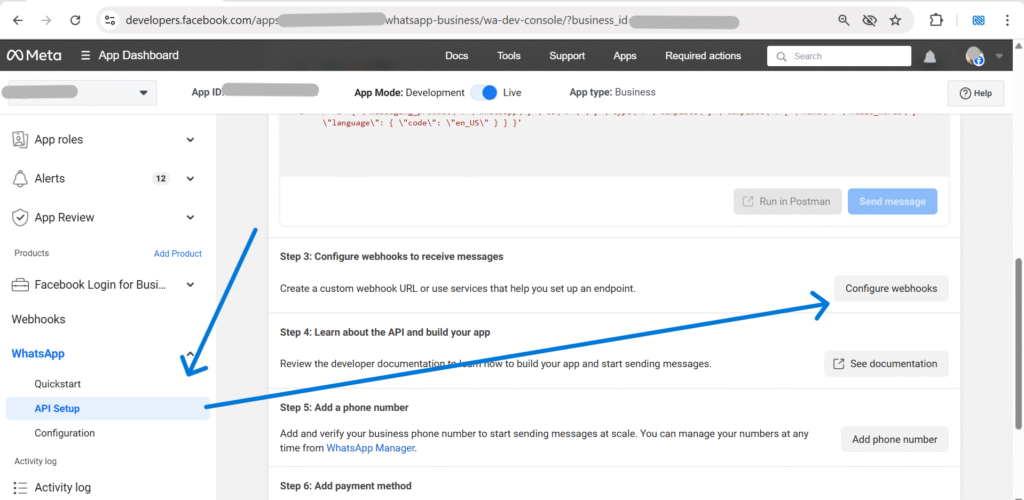
On API Setup page, click Add phone number.
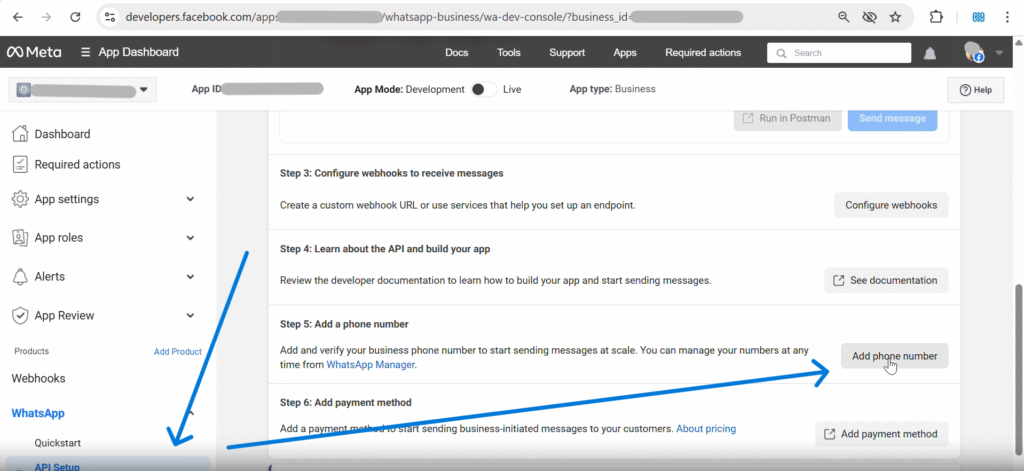
Add a WhatsApp Business number for Cloud API messaging. You will verify it via SMS. -
In the popup, Create a WhatsApp Business profile, fill details, then click Next.
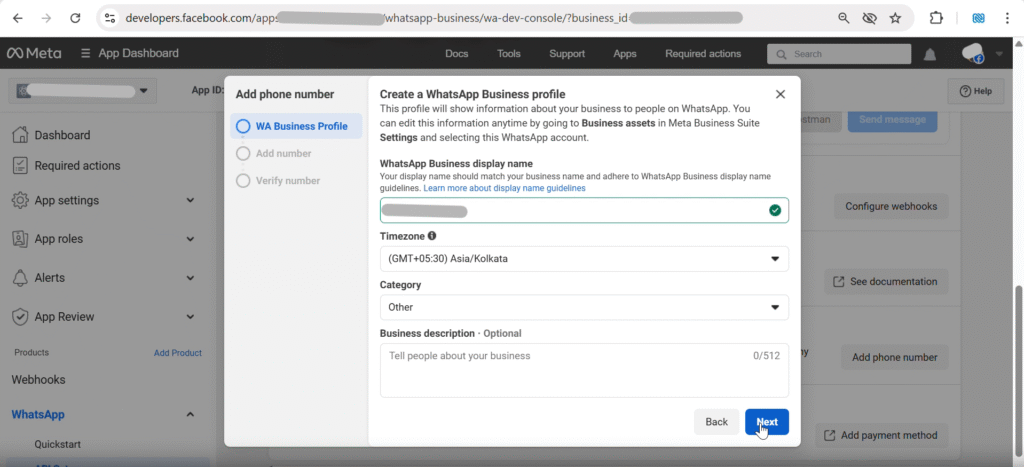
This profile appears in WhatsApp when your business messages customers. - Add your new WhatsApp phone number, verify via SMS code, then proceed to token generation.
Generate Access Tokens
Temporary token (Quickstart)
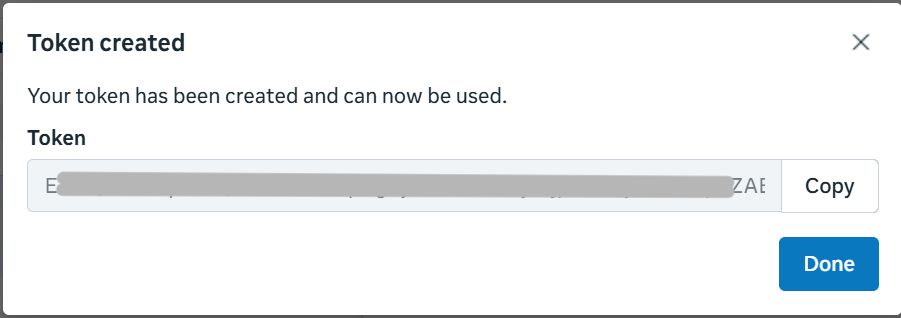
In API Setup, generate the access token and set App Mode to LIVE. Copy values needed for plugin settings.

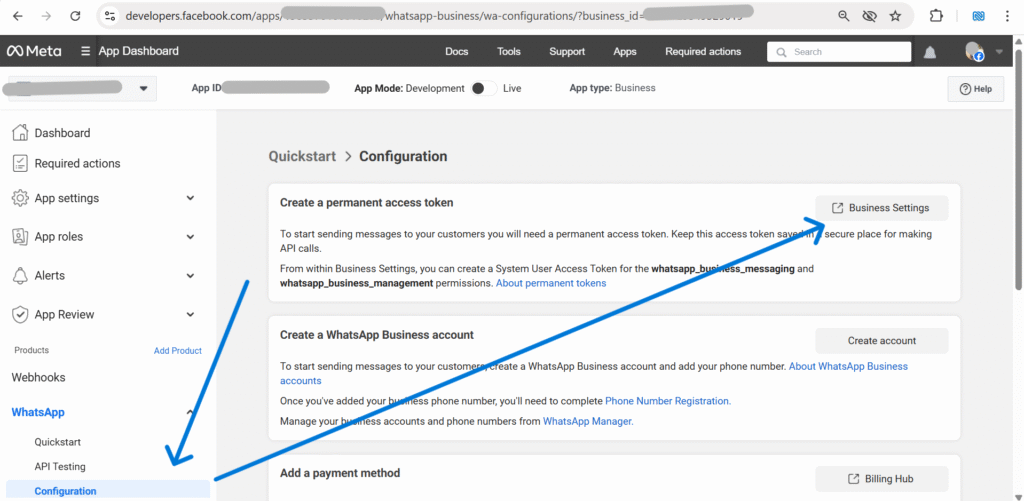
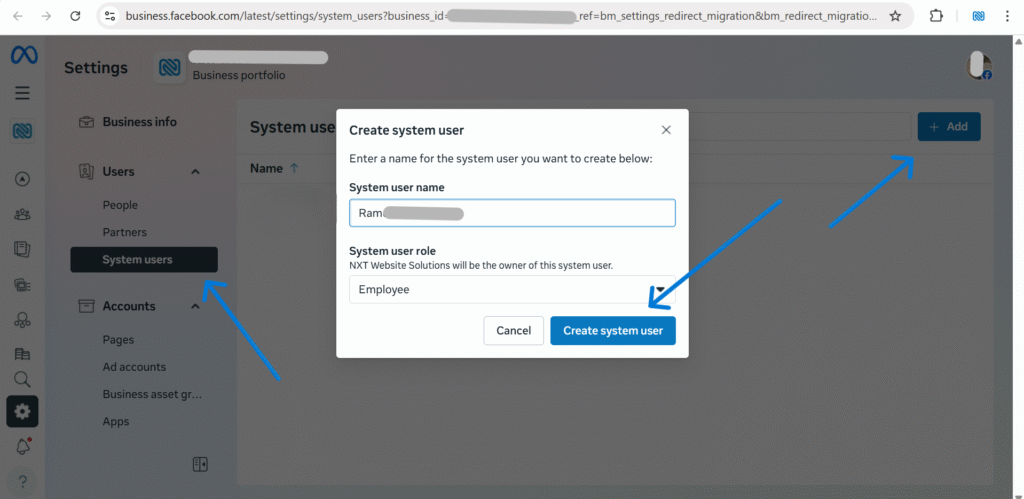
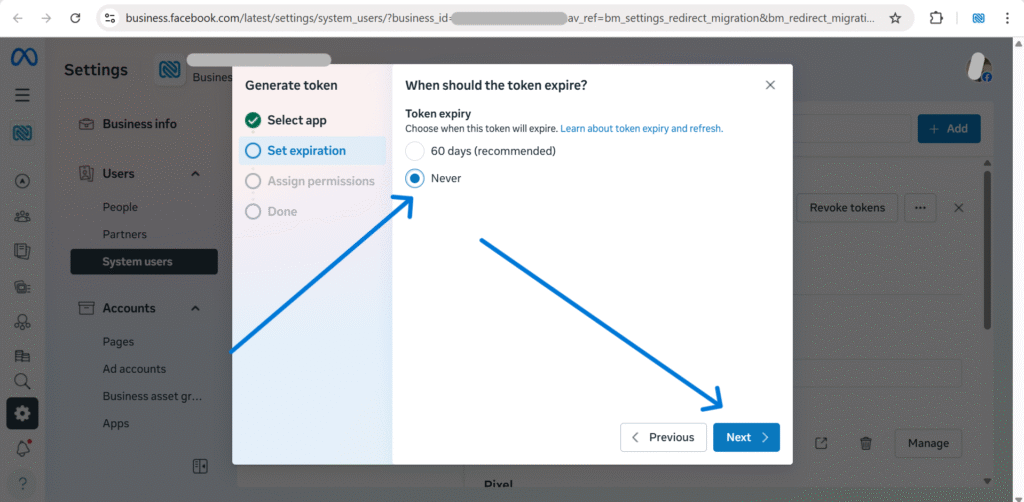
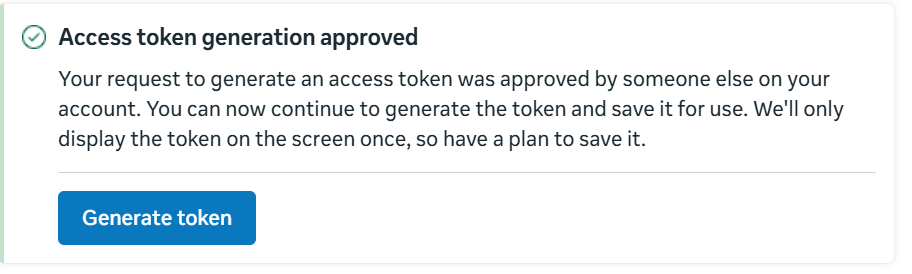
Generate a permanent access token
For production sites, create a system user in Business Settings, assign WhatsApp assets, and generate a token with expiration set to Never.
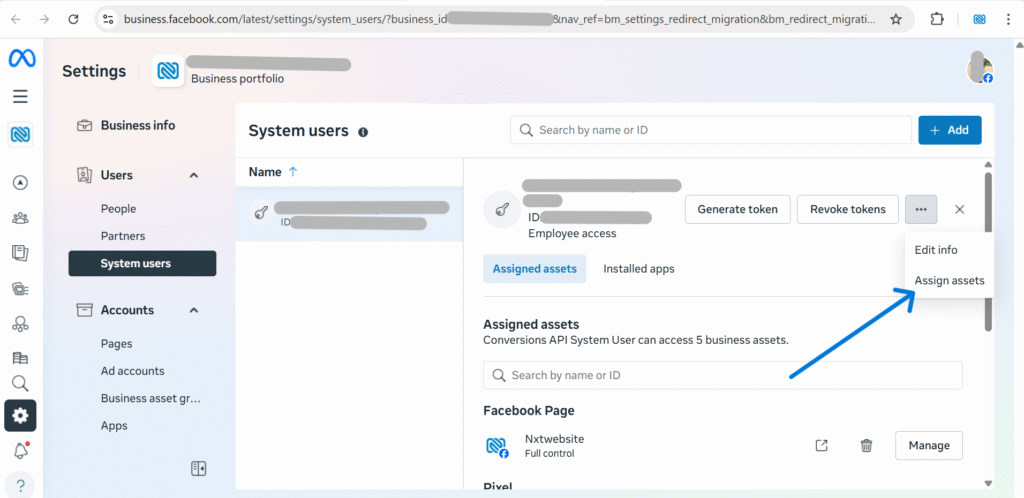
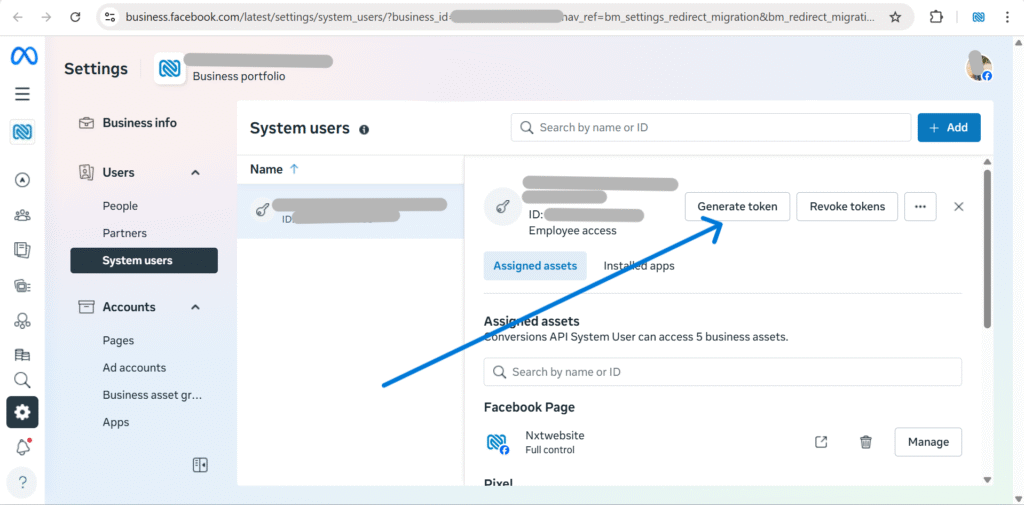
Assign permissions: business_management, whatsapp_business_management, whatsapp_business_messaging (and whatsapp_business_manage_events optional).
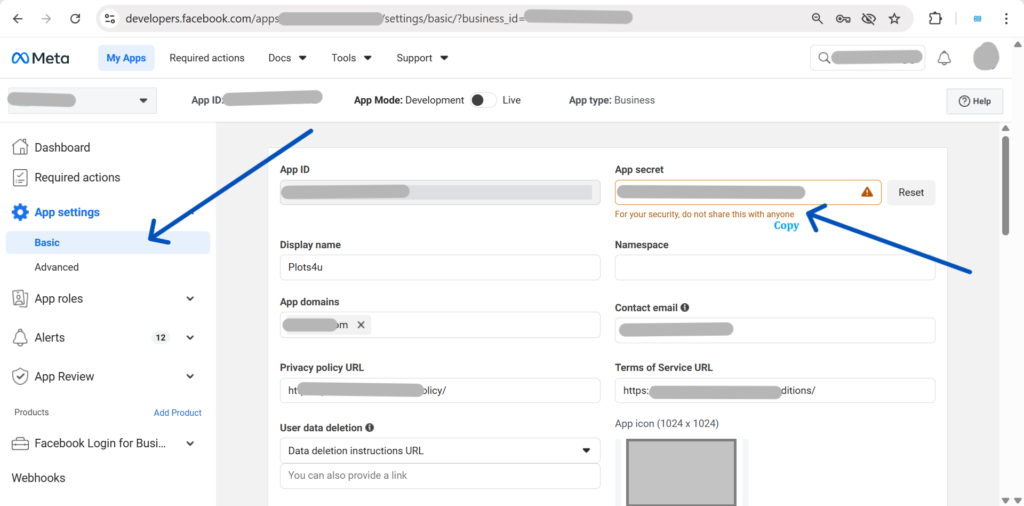
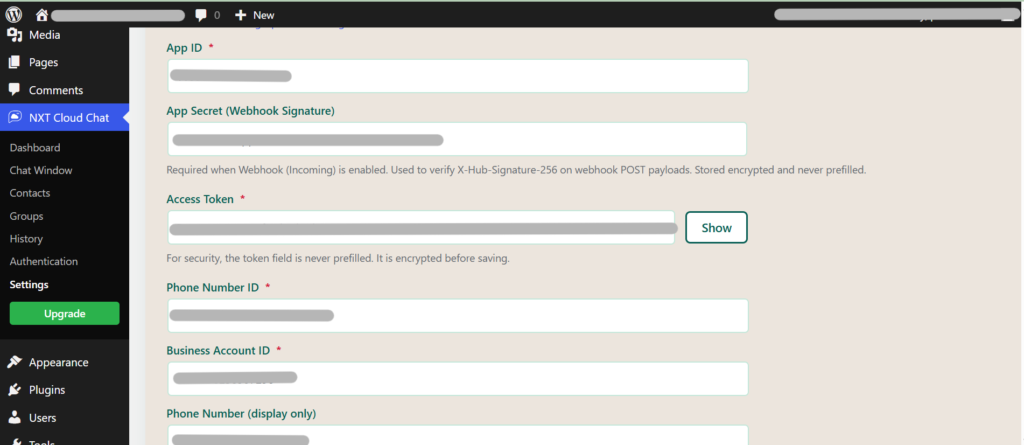
Plugin Settings & Connection Check
Copy App ID, App Secret, Access Token, Phone Number ID, and WhatsApp Business Account ID into your WordPress plugin Settings, then click Save Settings.
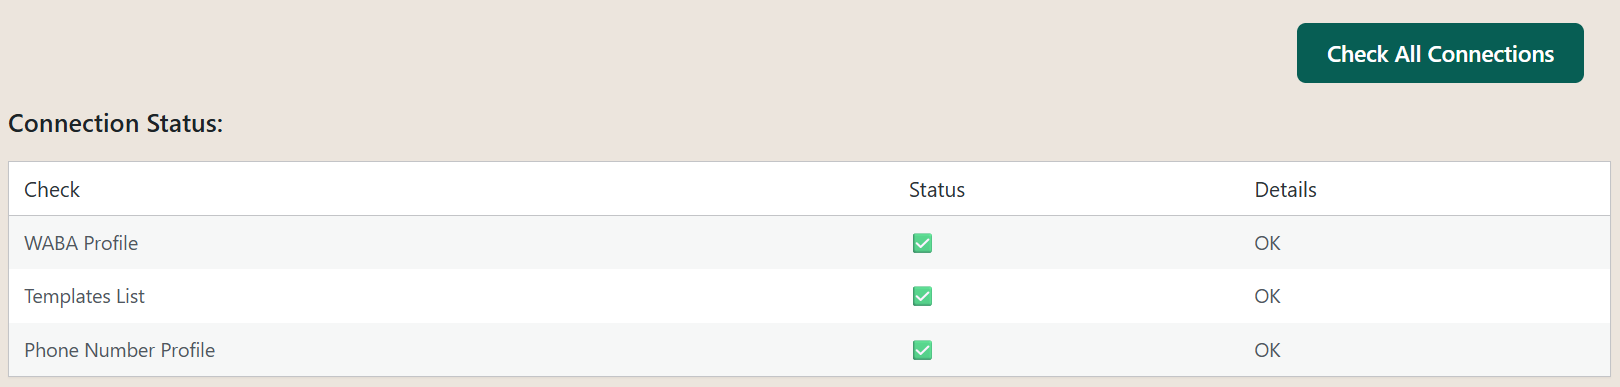
To confirm the configuration, click Check All Connections.
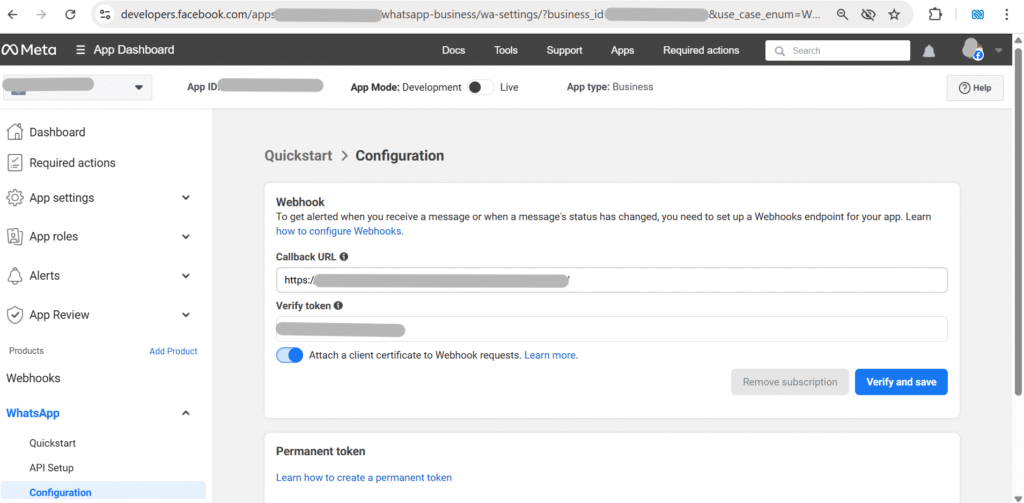
Configure Webhooks (Receive Messages)
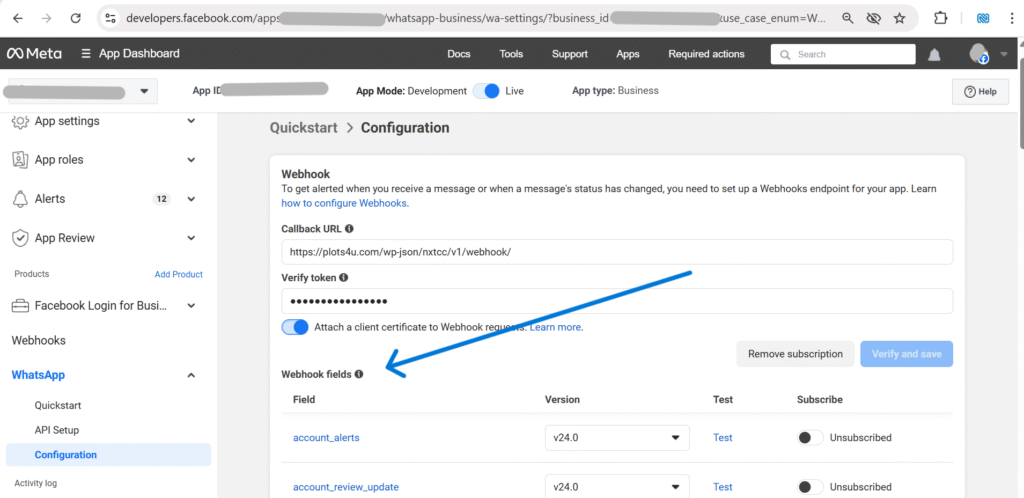
In Meta Developer Dashboard, click Configure webhooks. Copy Callback URL and Verify token from the plugin and paste them into Meta.
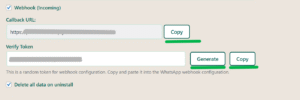
Once verified, subscribe the messages field (others are optional, for future use).

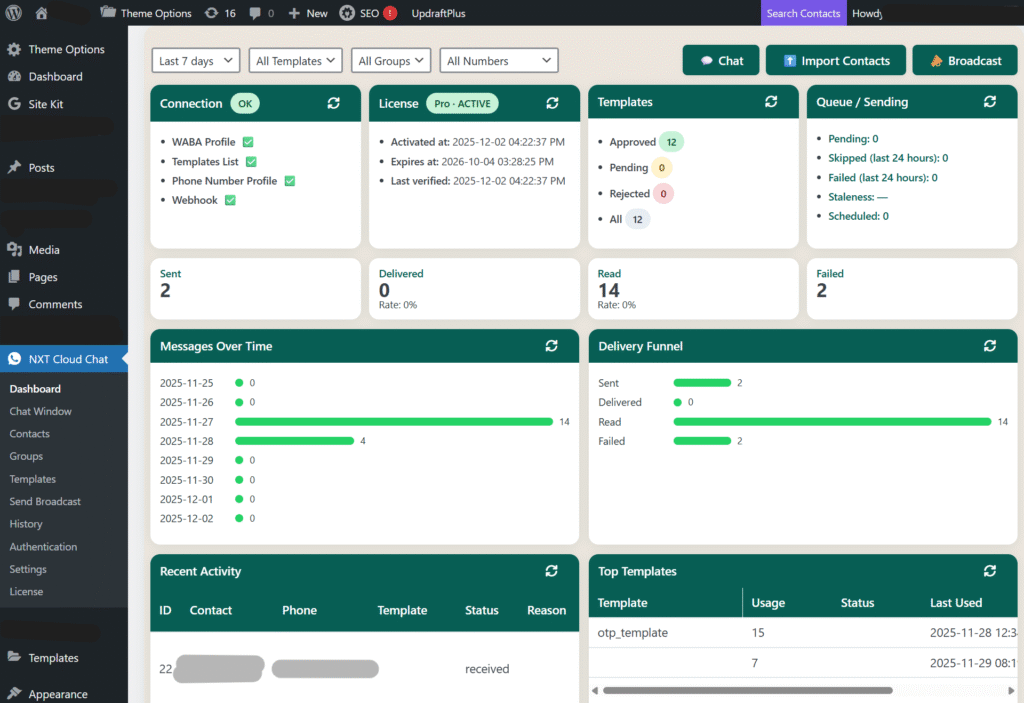
Plugin Interface Guide
A quick tour of where each major module lives in the WordPress admin.
Dashboard
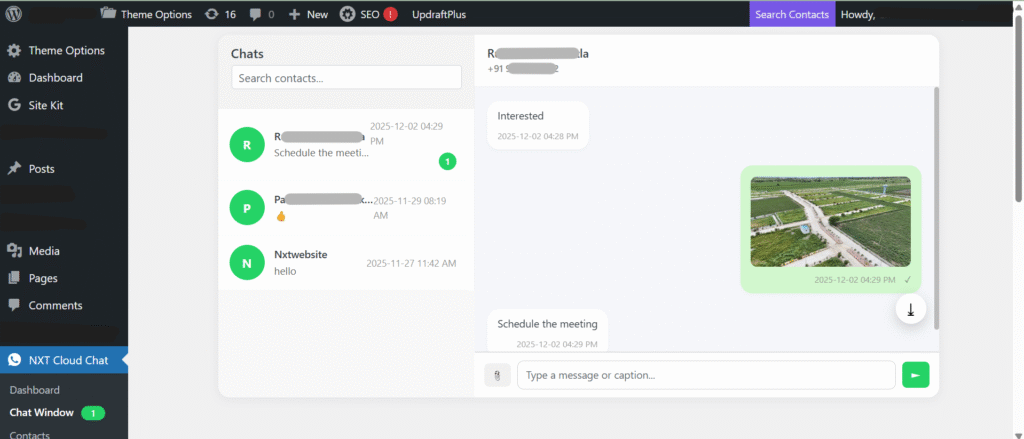
Chat Window
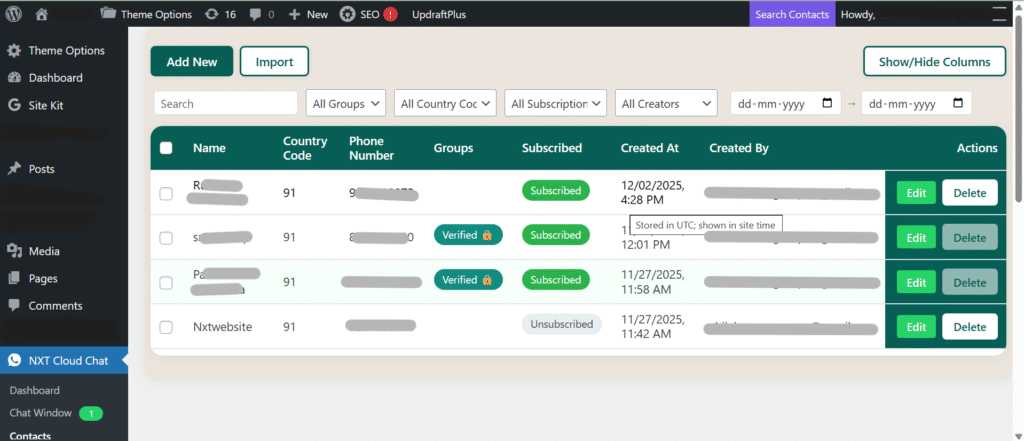
Contacts
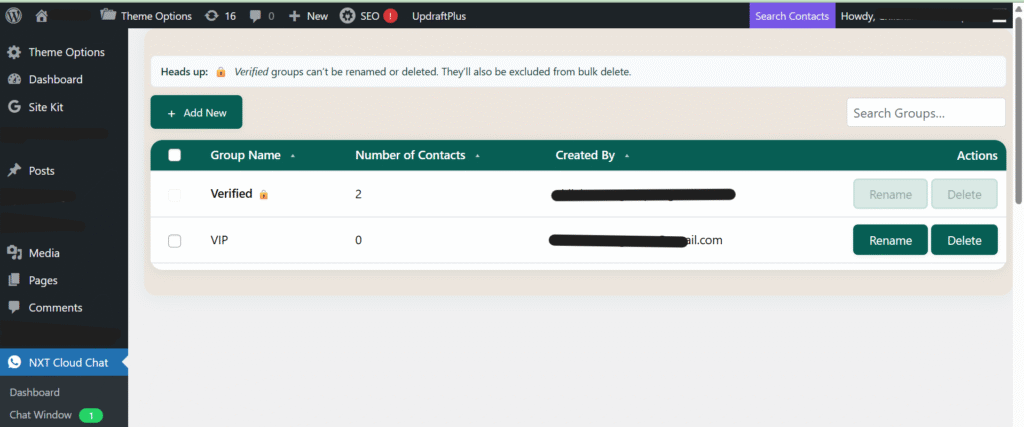
Groups
Templates

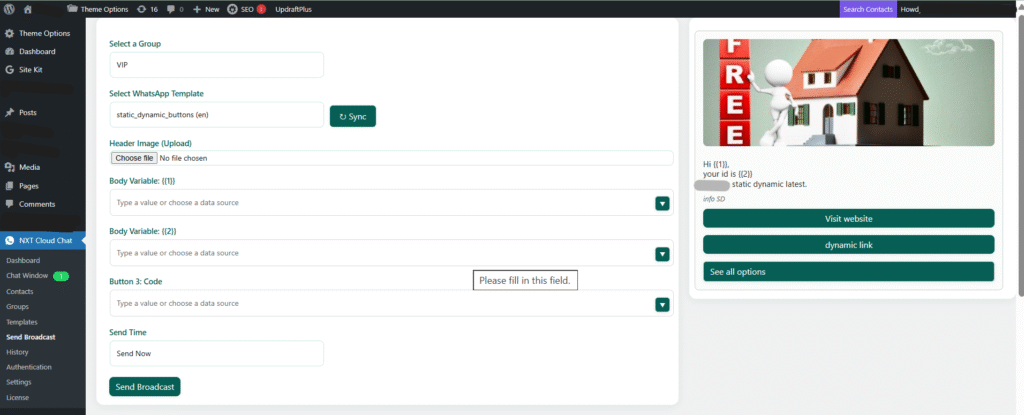
Send Broadcast (Bulk Messages)
History

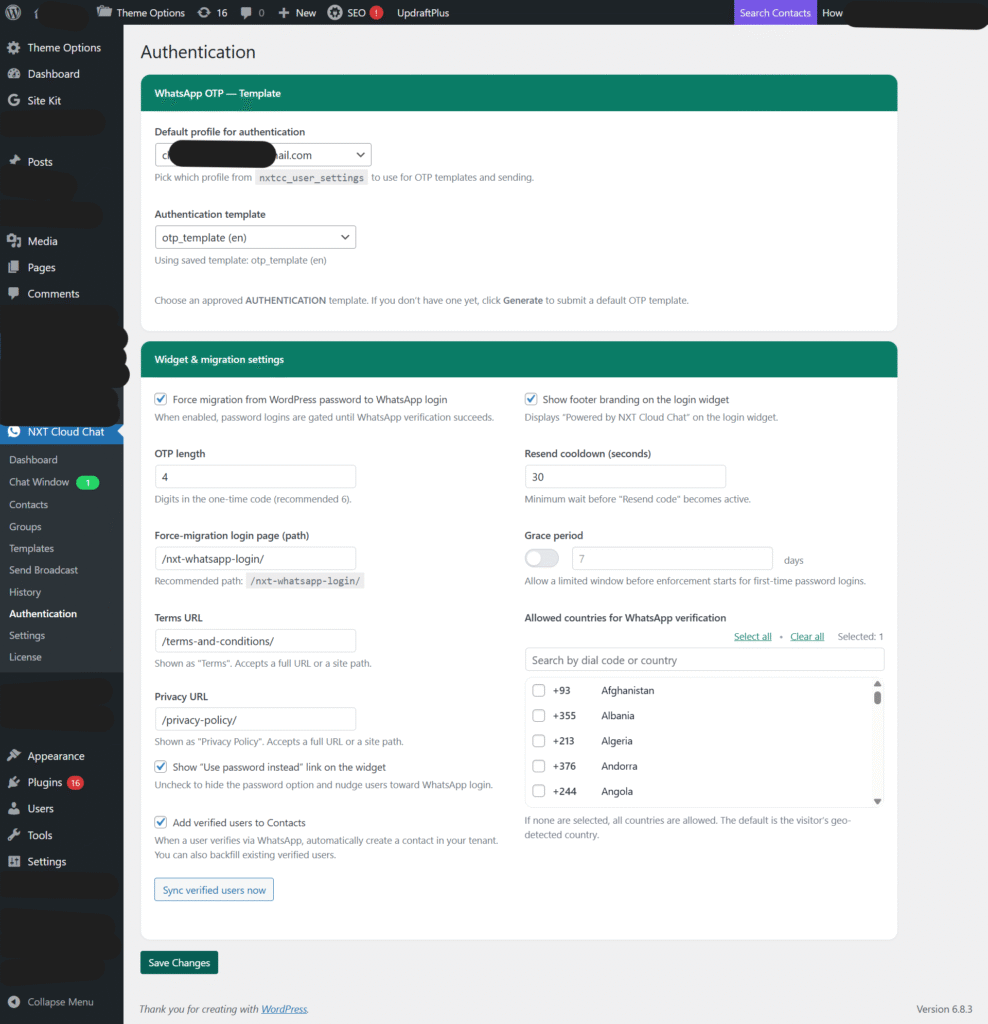
Authentication
Login Widget
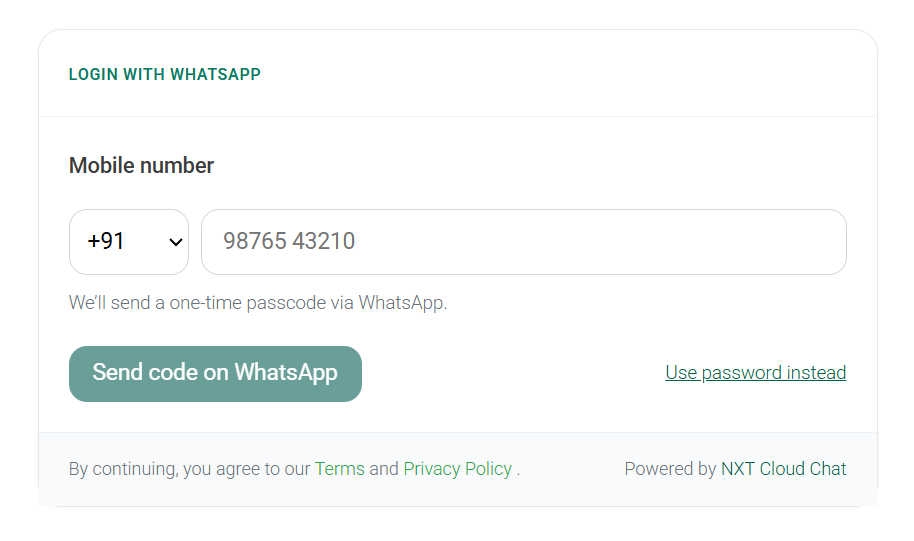
To add WhatsApp login, drag and drop the NXTCC: WhatsApp Login widget into your login page,
or use shortcode [nxtcc_login_whatsapp].