
What You Will Achieve After This Guide
By completing this guide, you will successfully connect your WordPress website with the official WhatsApp Cloud API using the NXT Cloud Chat plugin.
- Connect WordPress directly with the official WhatsApp Cloud API
- Send and receive WhatsApp messages inside the WordPress dashboard
- Manage contacts and groups for WhatsApp messaging
- Send bulk WhatsApp messages using approved templates
- Enable WhatsApp OTP login for your WordPress users
Pre-requisites (Before You Start)
To set up the WhatsApp Cloud API smoothly, make sure you have these ready before creating your Meta app:
-
Facebook Business Manager (Business Portfolio) access for your organization.
-
A valid phone number that is not currently used on a personal WhatsApp account.
-
Your website URL (used in app details, webhooks, and verification steps).
-
Meta Developer Account (developers.facebook.com) with profile verification completed.
Installing NXT Cloud Chat Plugin
Install via WordPress Dashboard
- Log in to your WordPress admin
- Go to Plugins → Add New
- Click Upload Plugin
- Select
nxt-cloud-chat.zip - Click Install Now
- Activate the plugin
Creating and Setting Up the WhatsApp Cloud API App (Meta Developer Platform)
In this section you will create a Meta app, attach the WhatsApp product, add a WhatsApp Business phone number, and enable API access.
Create a Meta Developer Account
- Visit: https://developers.facebook.com/
- Log in with your Facebook Account
- Accept the terms and complete profile verification
Create a New App
-
Go to My Apps → Create App

From the Meta Developer dashboard, click Create App to start a new integration. -
Click Create App
Choose the standard app creation flow (recommended for WhatsApp Cloud API). -
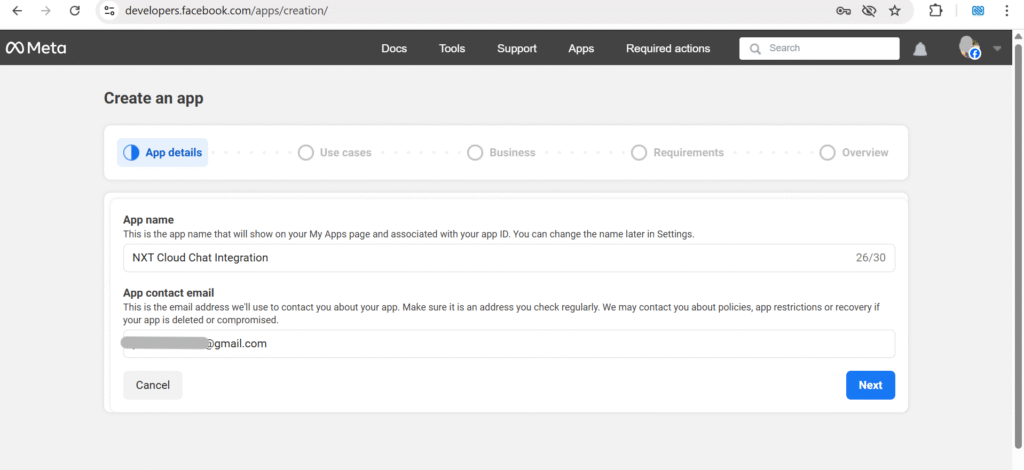
Enter your App Name and App Contact Email, then click
Next.

Use a name you can recognize later, like NXT Cloud Chat Integration. -
Select Other and click Next
This keeps the setup simple and avoids unnecessary product presets. -
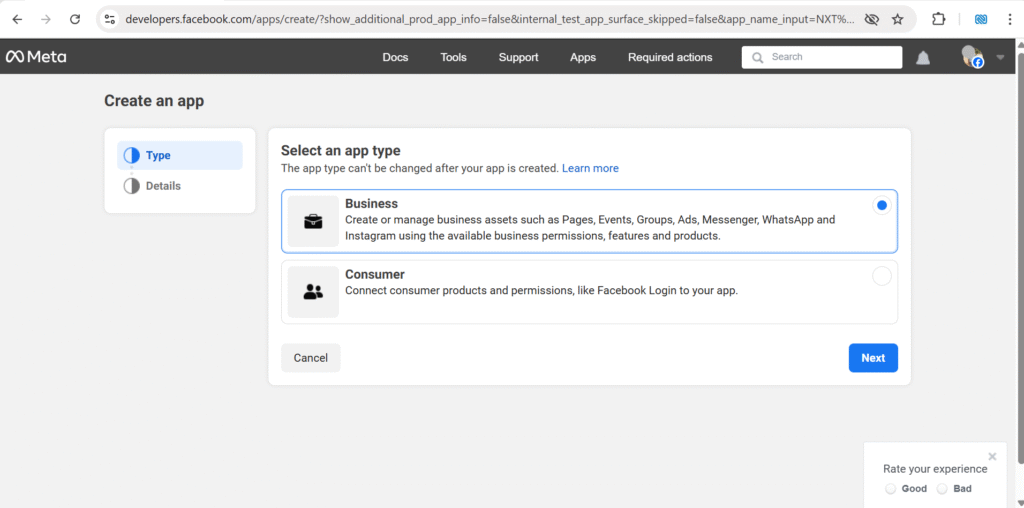
Select app type Business and click Next
WhatsApp Cloud API works under Business apps tied to your Business Portfolio. -
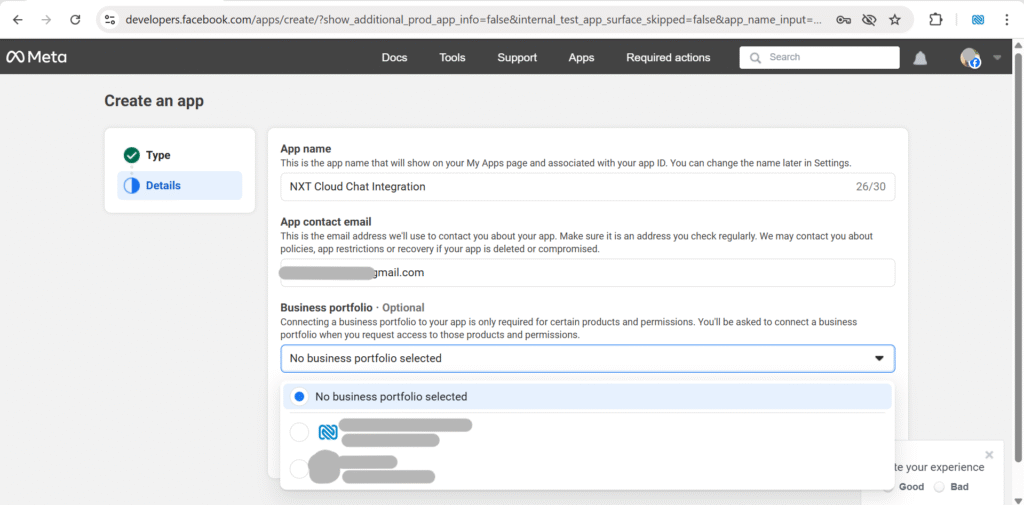
Choose your Business portfolio then click Create app
Select the correct portfolio where your WhatsApp Business Account should live. -
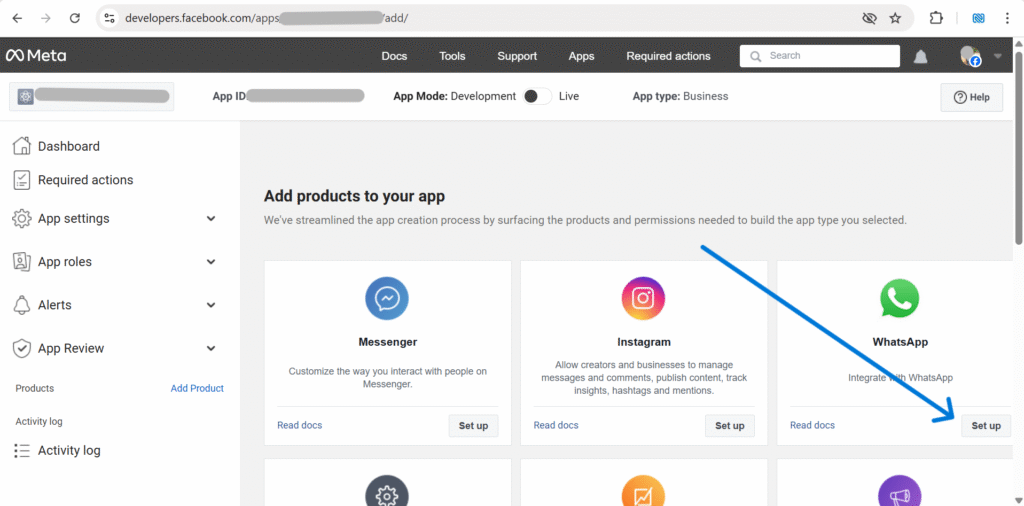
Add WhatsApp product: scroll to WhatsApp and click Set Up.
This enables WhatsApp Cloud API tools like phone number setup, tokens, and webhooks. -
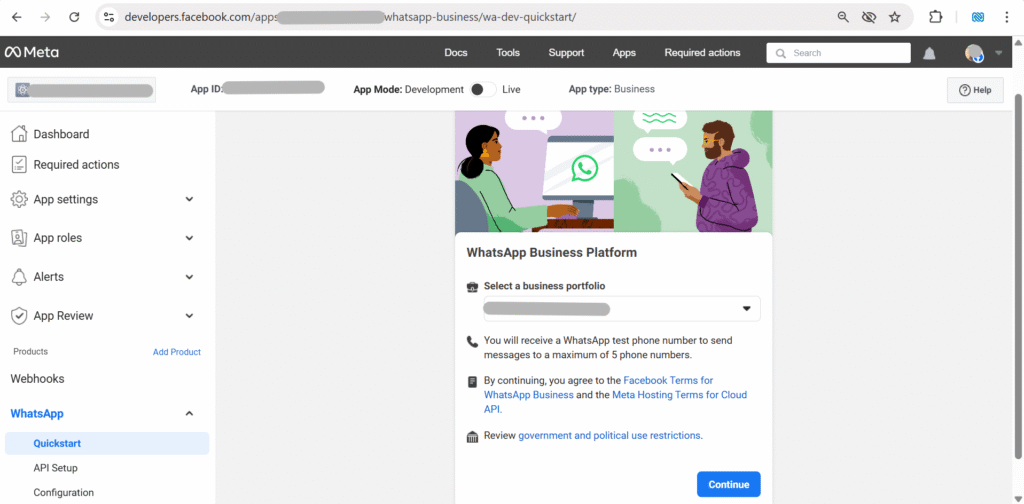
Open Quickstart under WhatsApp and click Start using the
API.
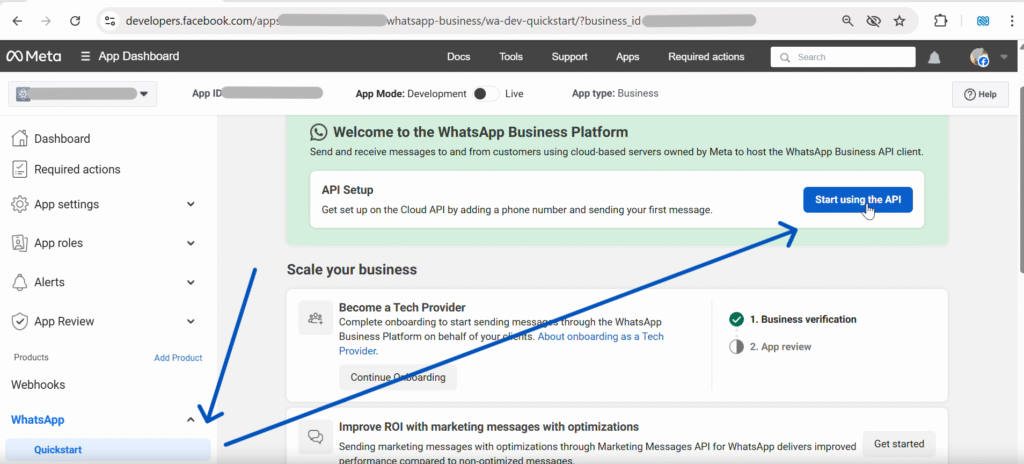
The Quickstart page helps you generate the first token and add a business phone number. -
On API Setup page, click Add phone number.
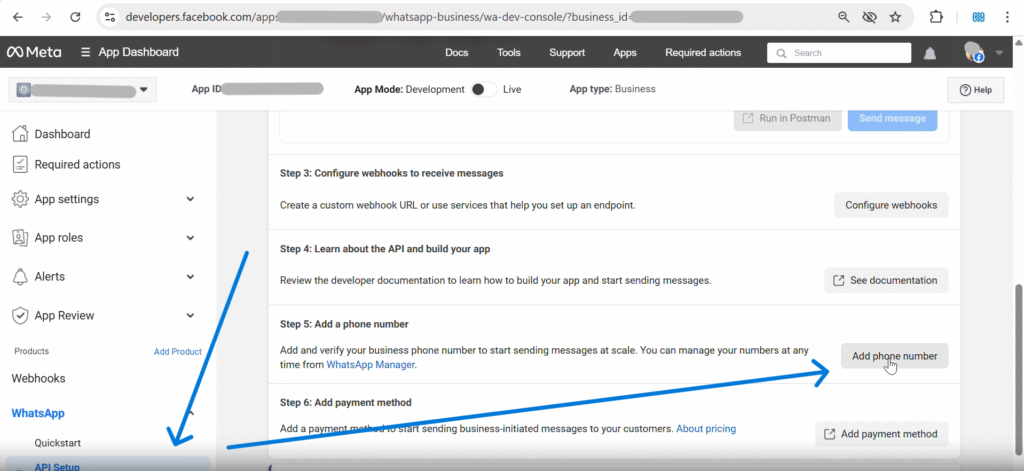
Add a WhatsApp Business number for Cloud API messaging. You will verify it via SMS. -
In the popup, Create a WhatsApp Business profile, fill details, then click
Next.
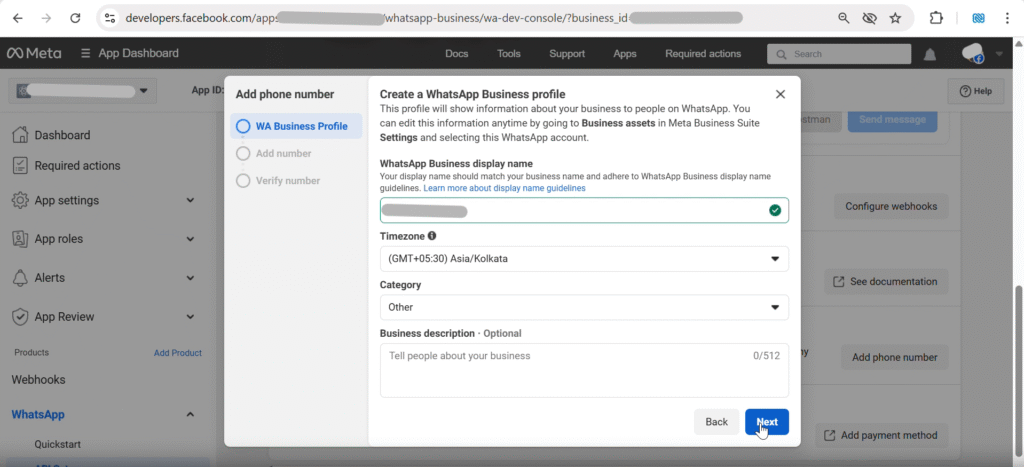
This profile appears in WhatsApp when your business messages customers. - Add your new WhatsApp phone number, verify via SMS code, then proceed to token generation.
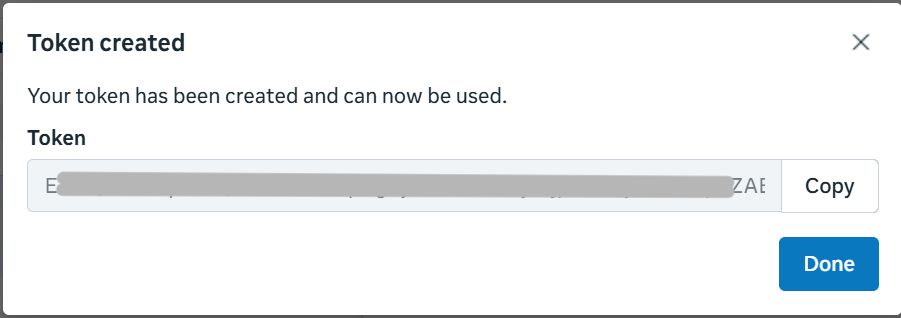
Generate Access Tokens
Temporary token (Quickstart)
In API Setup, generate the access token and set App Mode to LIVE. Copy values needed for plugin settings.

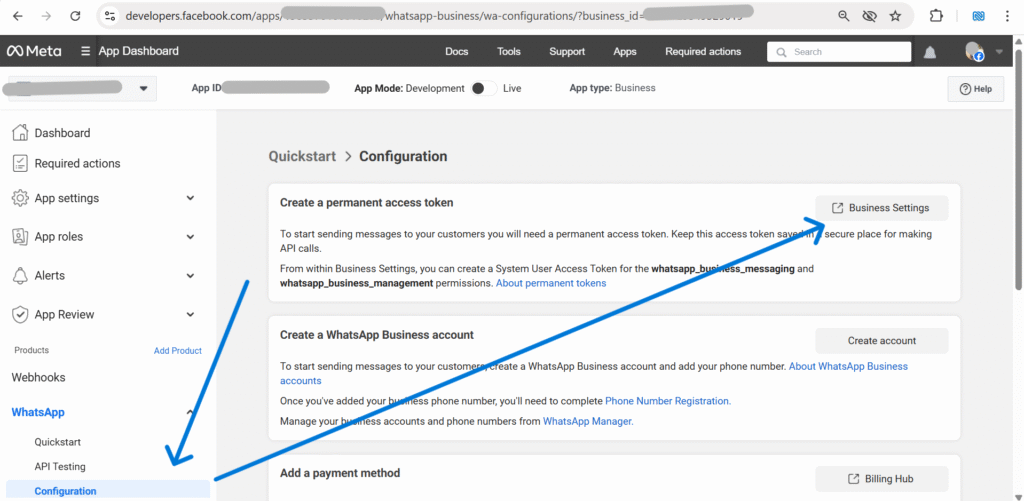
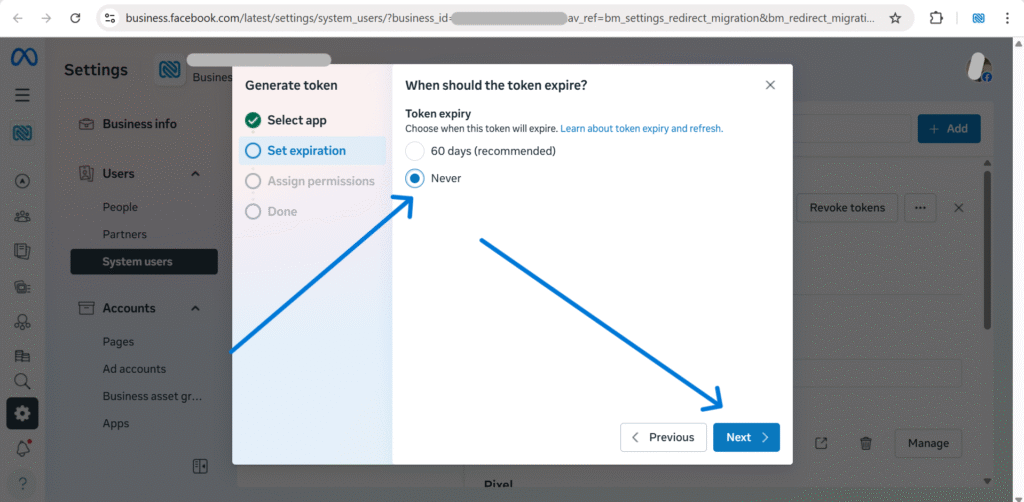
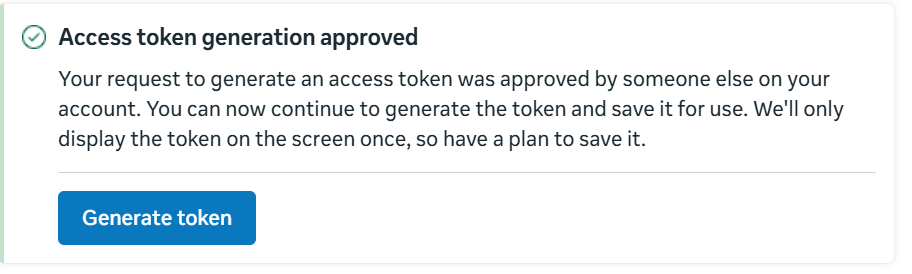
Generate a permanent access token
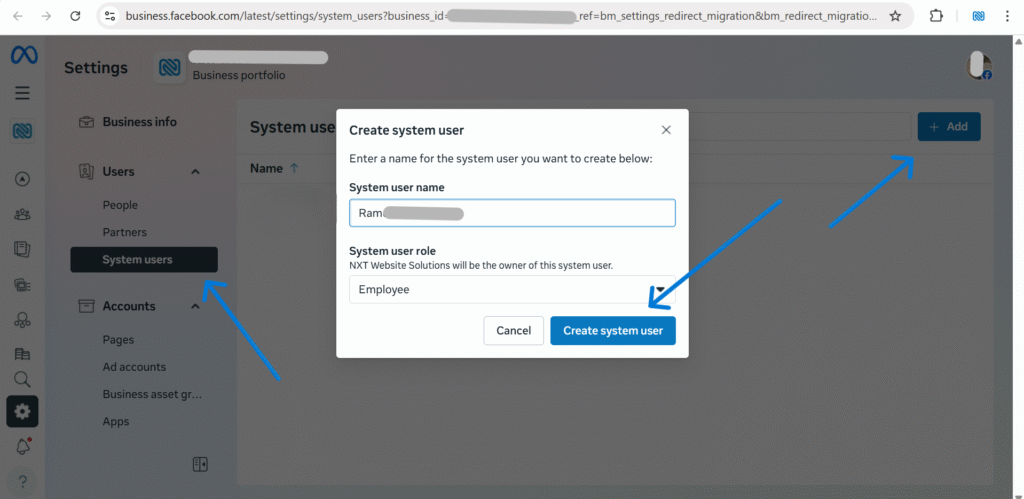
For production sites, create a system user in Business Settings, assign WhatsApp assets, and generate a token with expiration set to Never.
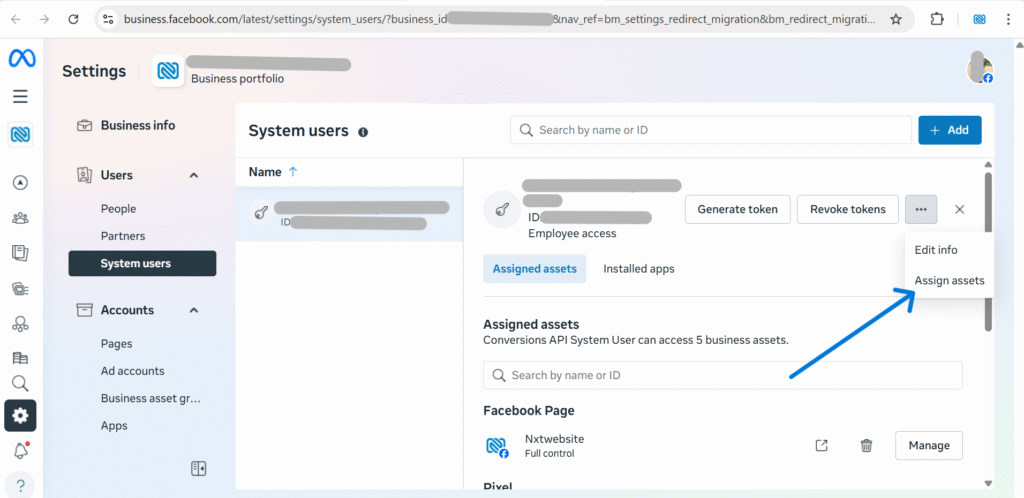
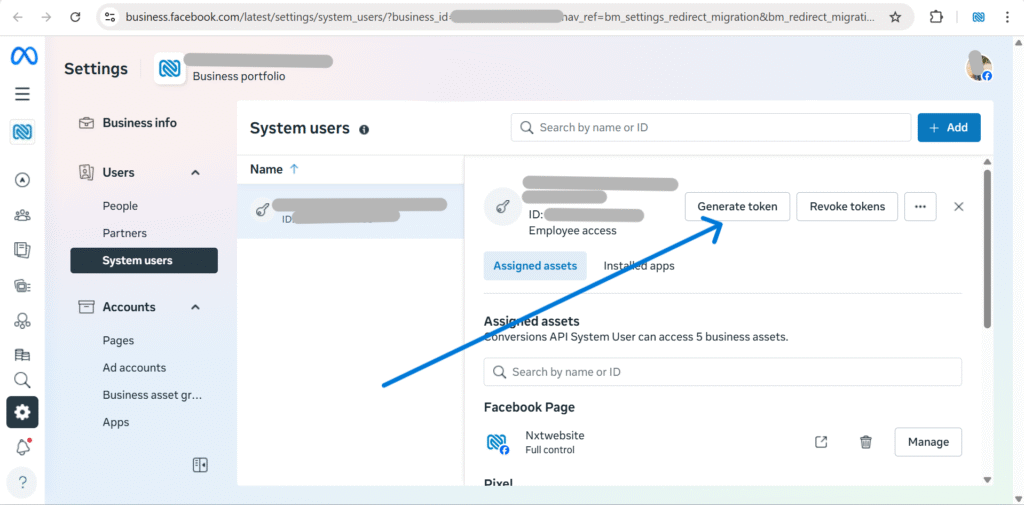
Assign permissions: business_management, whatsapp_business_management, whatsapp_business_messaging (and whatsapp_business_manage_events optional).
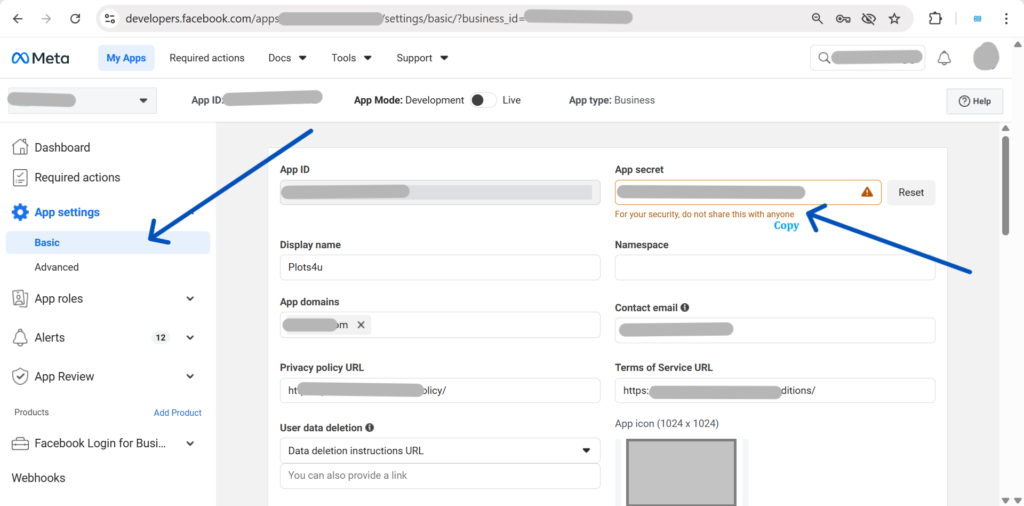
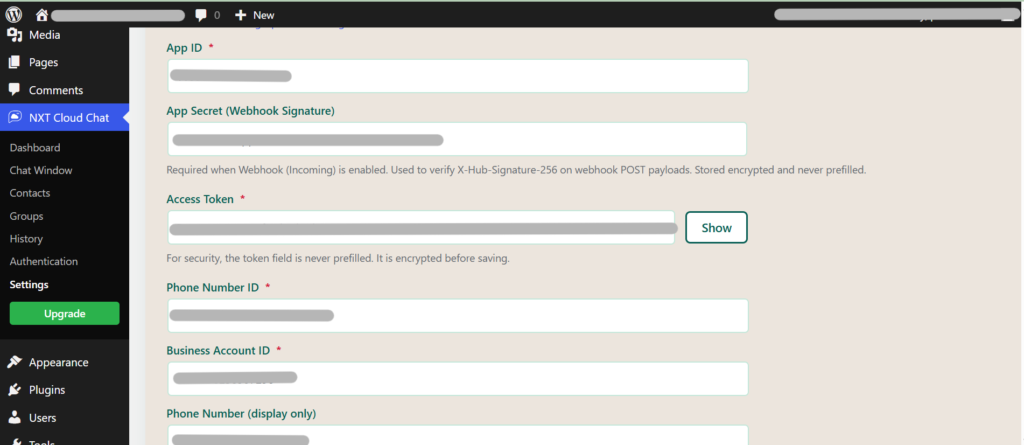
Plugin Settings & Connection Check
Copy App ID, App Secret, Access Token, Phone Number ID, and WhatsApp Business Account ID into your WordPress plugin Settings, then click Save Settings.
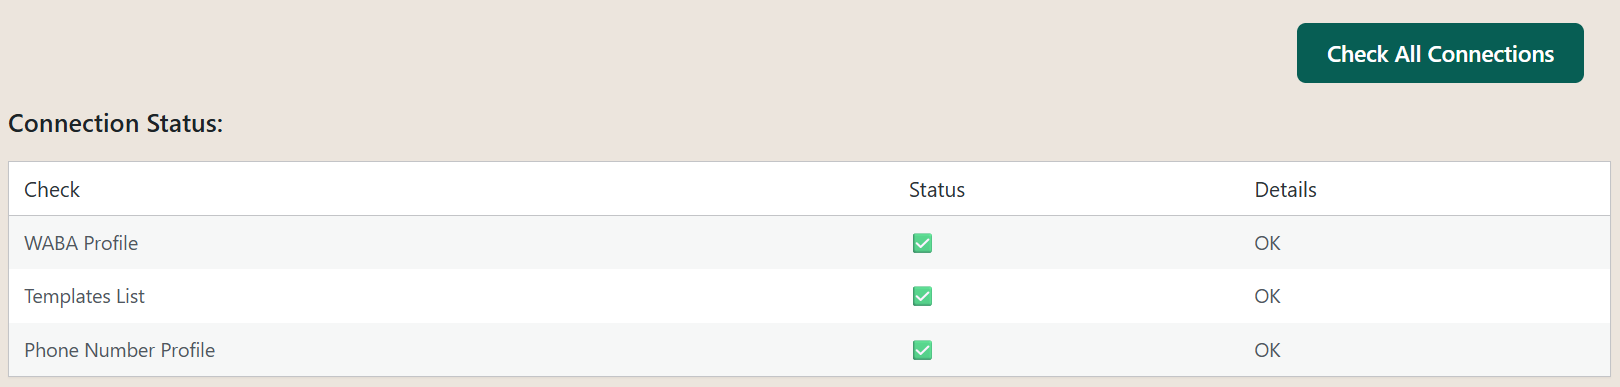
To confirm the configuration, click Check All Connections.
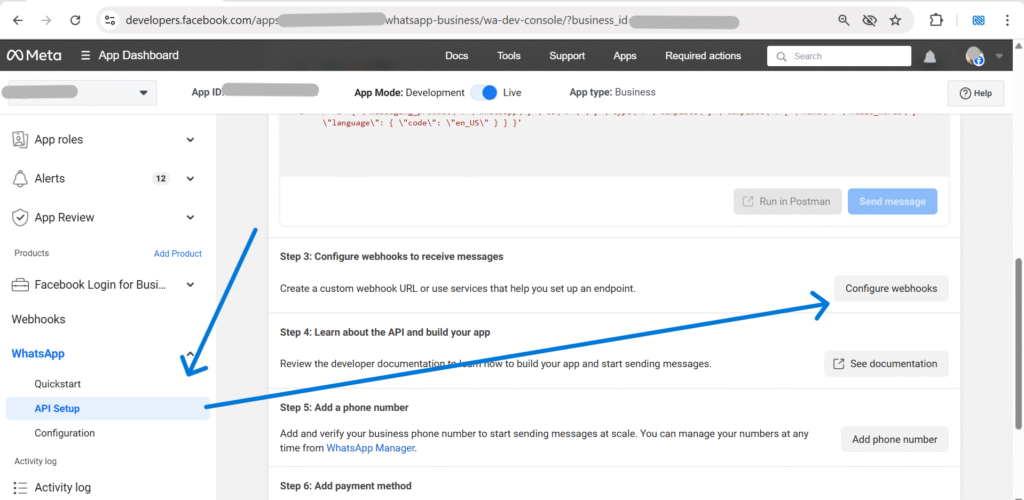
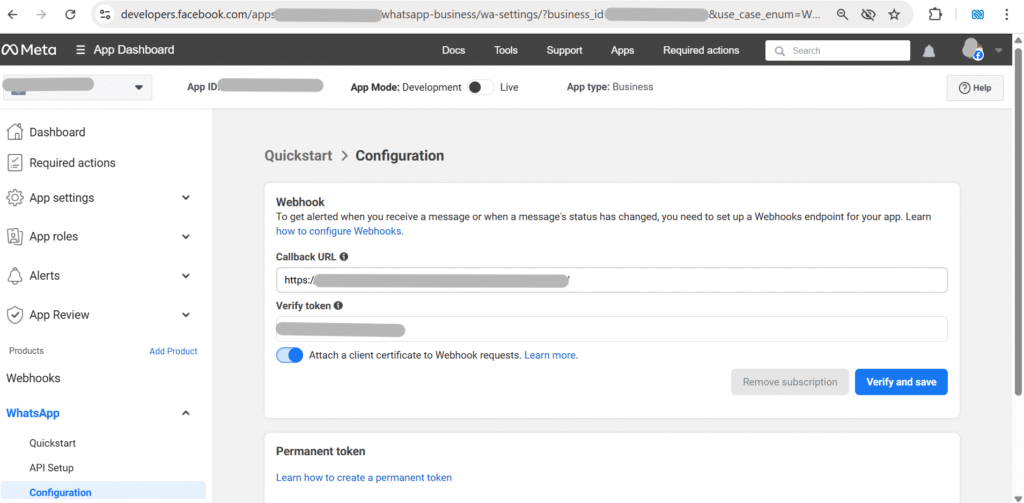
Configure Webhooks (Receive Messages)
In Meta Developer Dashboard, click Configure webhooks. Copy Callback URL and Verify token from the plugin and paste them into Meta.
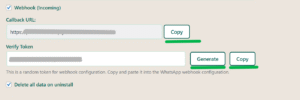
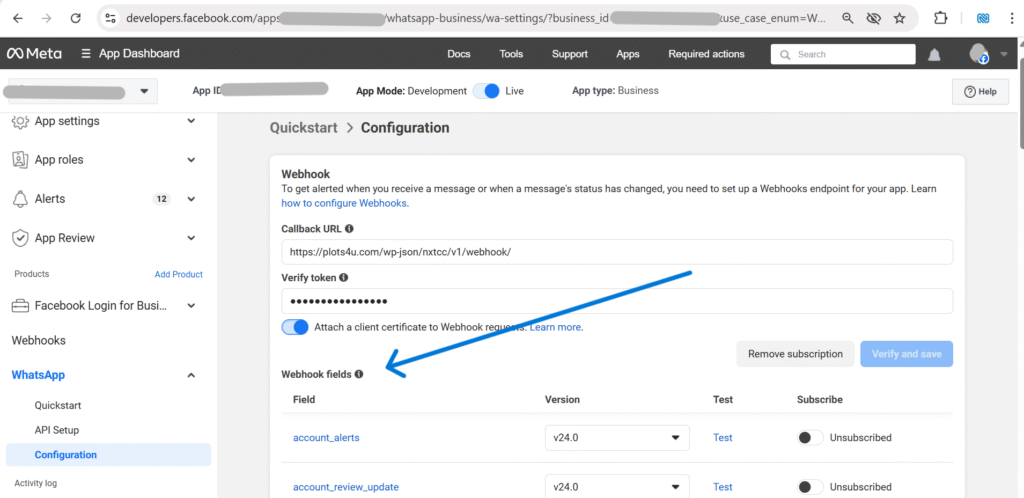
Once verified, subscribe the messages field (others are optional, for future use).

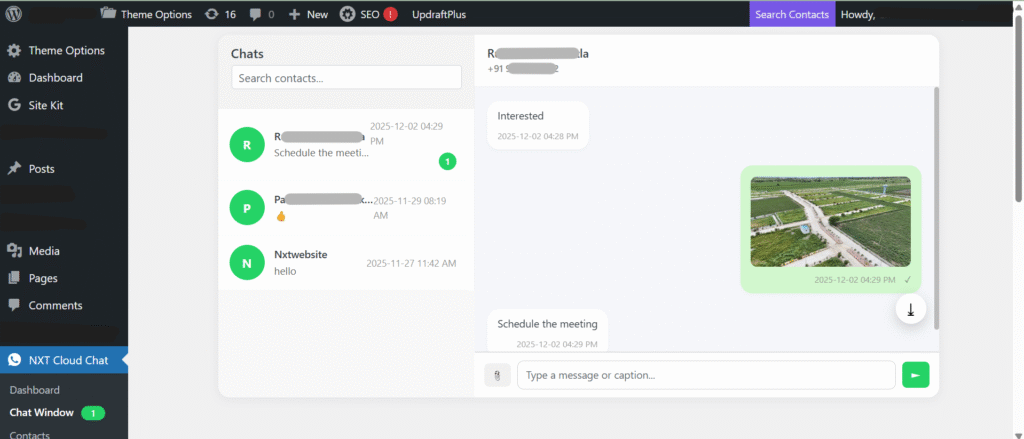
After the connection check succeeds, you may try sending a message from the Chat Window. However, in most cases this will fail or disabled if the recipient has not started a conversation first. This is due to WhatsApp Cloud API messaging rules.
Understanding the 24-Hour Messaging Window
WhatsApp only allows free-form outgoing messages within a 24-hour customer service window. This window begins when the user sends the first message to your WhatsApp Business number.
If no message has been received from a user, WhatsApp will block outgoing messages sent directly from the chat interface.
Recommended First Test
- Open WhatsApp on your phone.
- Send a message to your registered WhatsApp Business number.
- Go to NXT Cloud Chat → Chat Window in WordPress.
- You should now see the incoming message.
- Reply from the chat window to confirm messaging works.
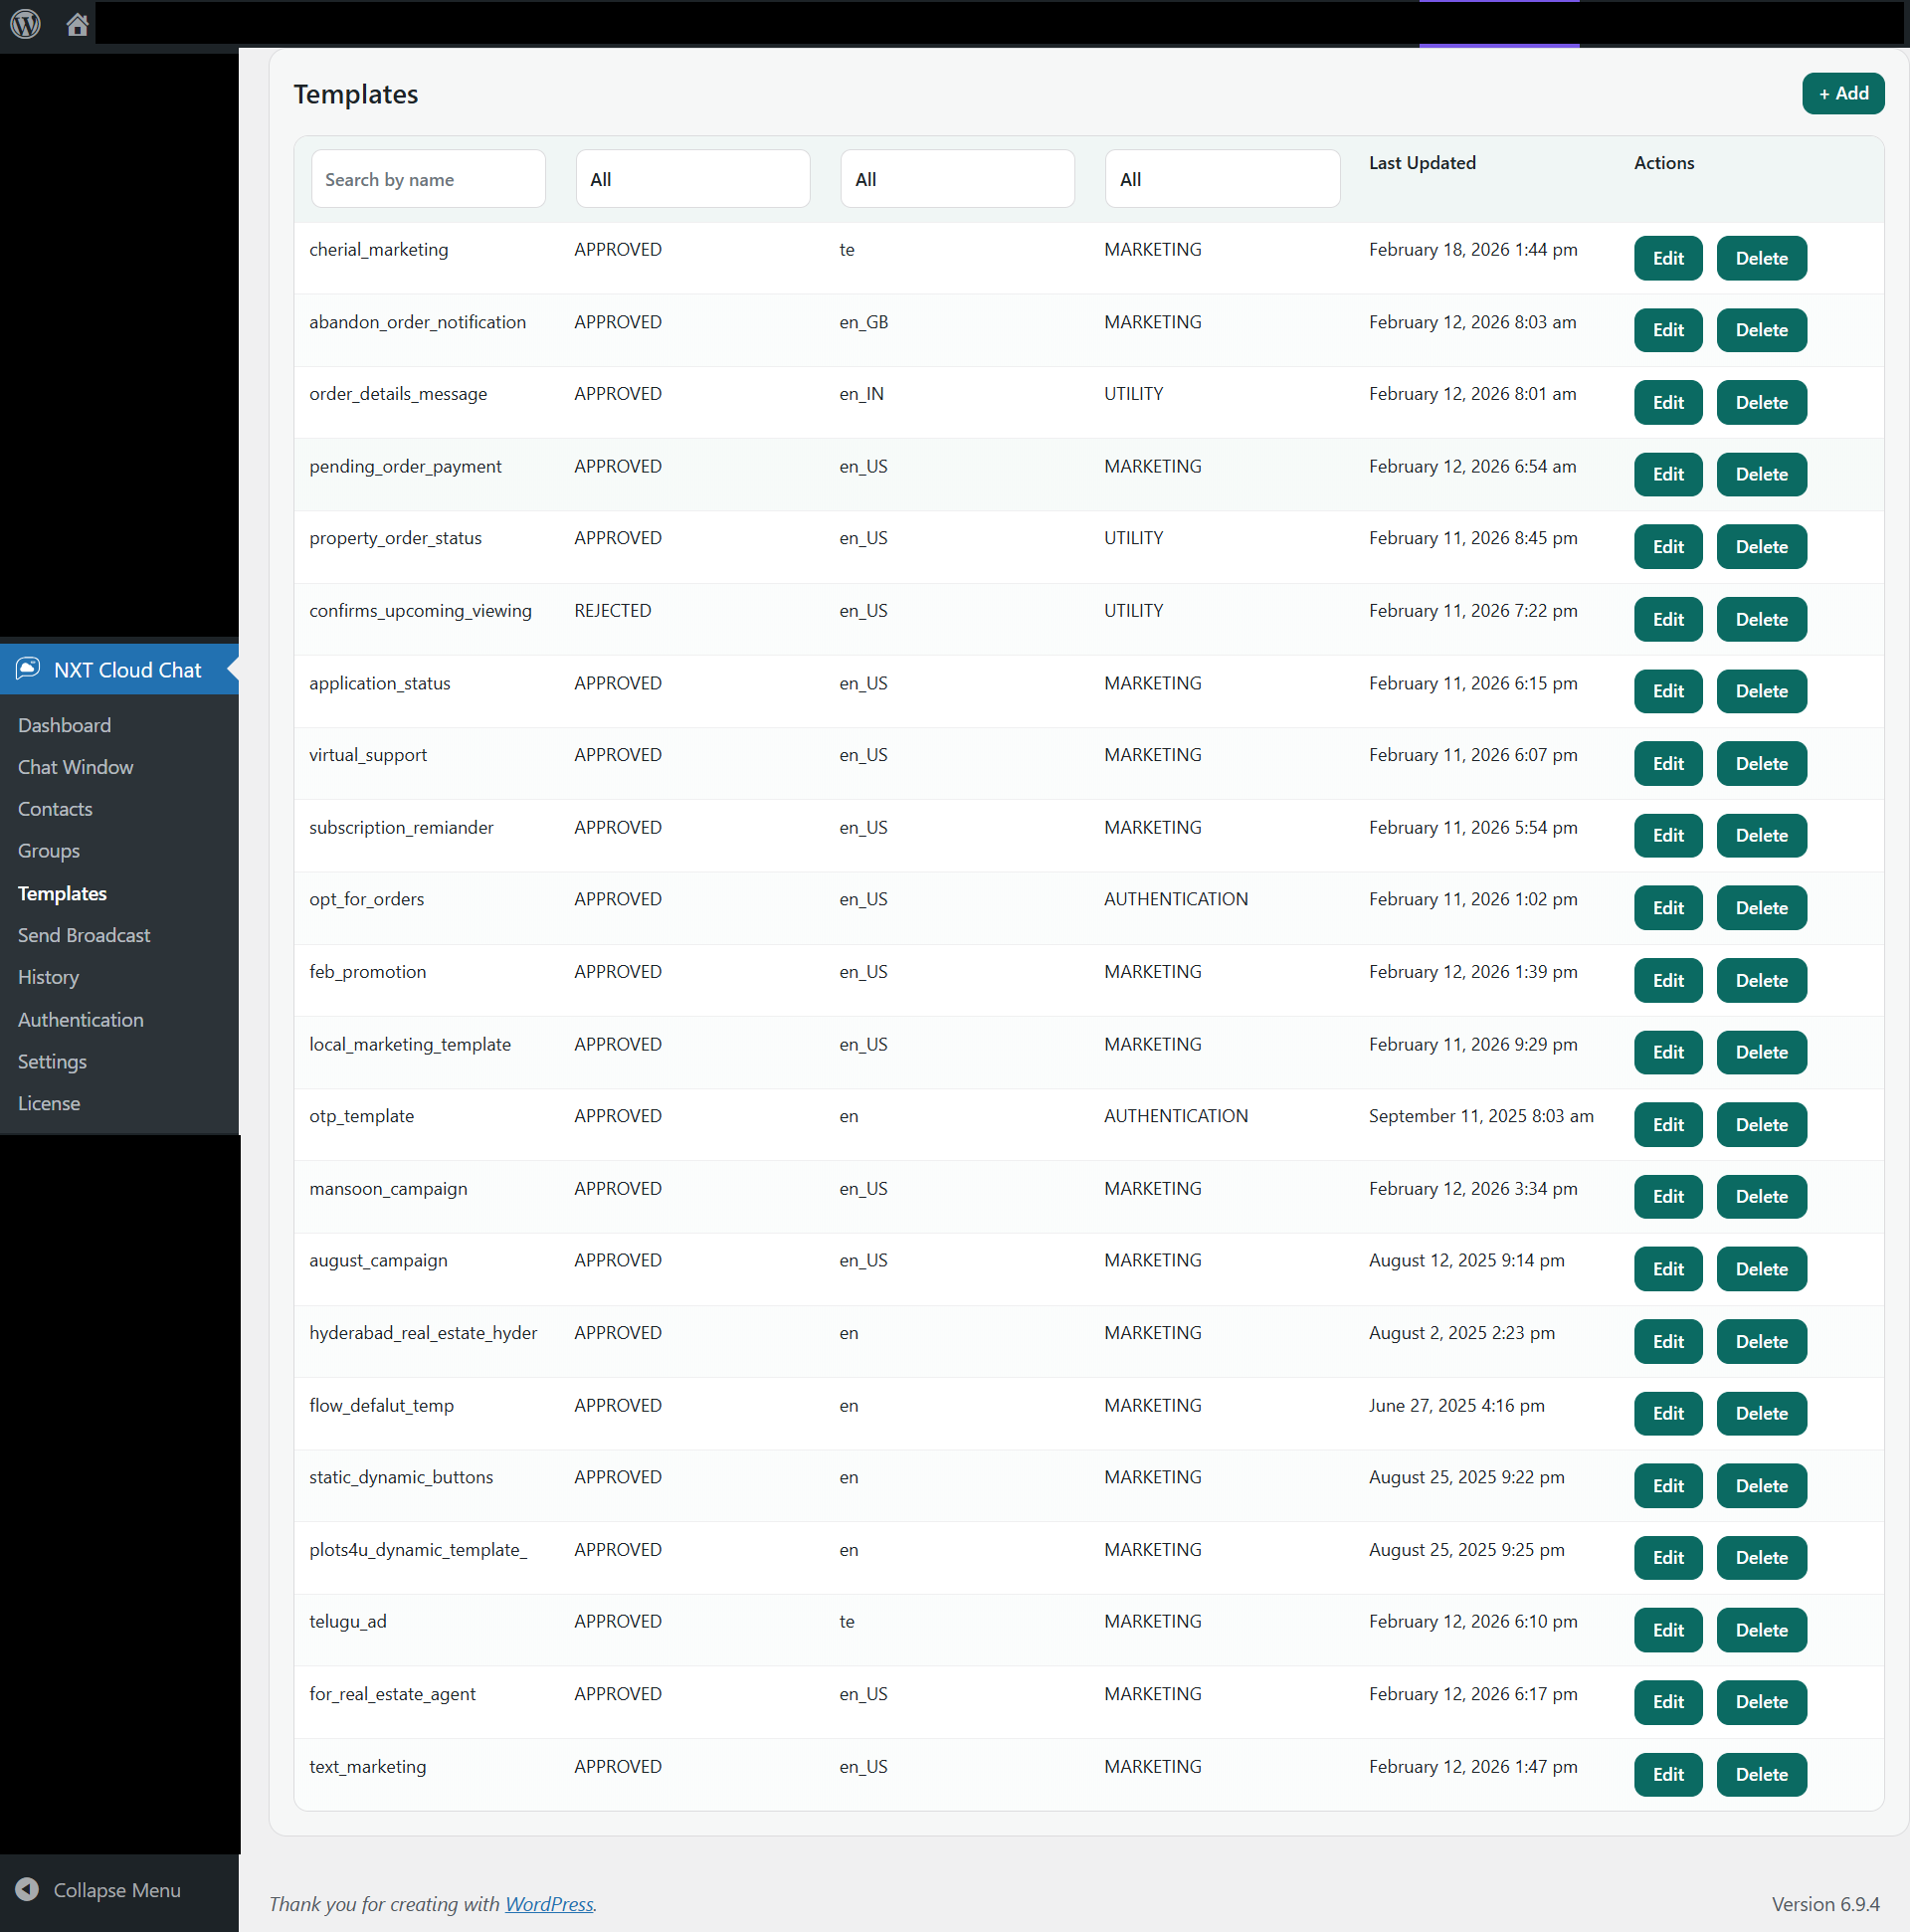
Alternative Test Using Templates
If you want to test outgoing messages without waiting for a user message, you can send an approved WhatsApp template.
- Go to NXT Cloud Chat → Settings
- Open Connection Diagnostics
- Send the default template
hello_world
Templates are allowed outside the 24-hour window and are typically used for notifications, alerts, and automated messages.
Troubleshooting Common Issues
If something does not work during setup, check these common issues first. Most connection problems are related to token permissions, webhook configuration, or Meta app mode.
Messages not sending
- Make sure your Meta app is set to LIVE mode.
- Confirm the Access Token has the correct permissions.
- Check that the recipient has started a conversation (24-hour window rule).
Connection check failed
- Verify App ID, App Secret, and Access Token are copied correctly.
- Make sure the WhatsApp phone number is properly added in the Meta dashboard.
- Regenerate the access token if it has expired.
Webhook verification failed
- Ensure the Callback URL is publicly accessible.
- Verify that the Verify Token matches exactly between Meta and the plugin.
- Check that your website allows incoming HTTPS requests.
Messages not appearing in Chat Window
- Confirm webhook subscription includes the messages field.
- Send a test message from your phone to the WhatsApp Business number.
- Check server logs if webhook requests are blocked by firewall.
Contact support at support@nxtwebsite.com and include screenshots of your Meta API setup and plugin settings.
Plugin Interface Guide
A quick tour of where each major module lives in the WordPress admin.
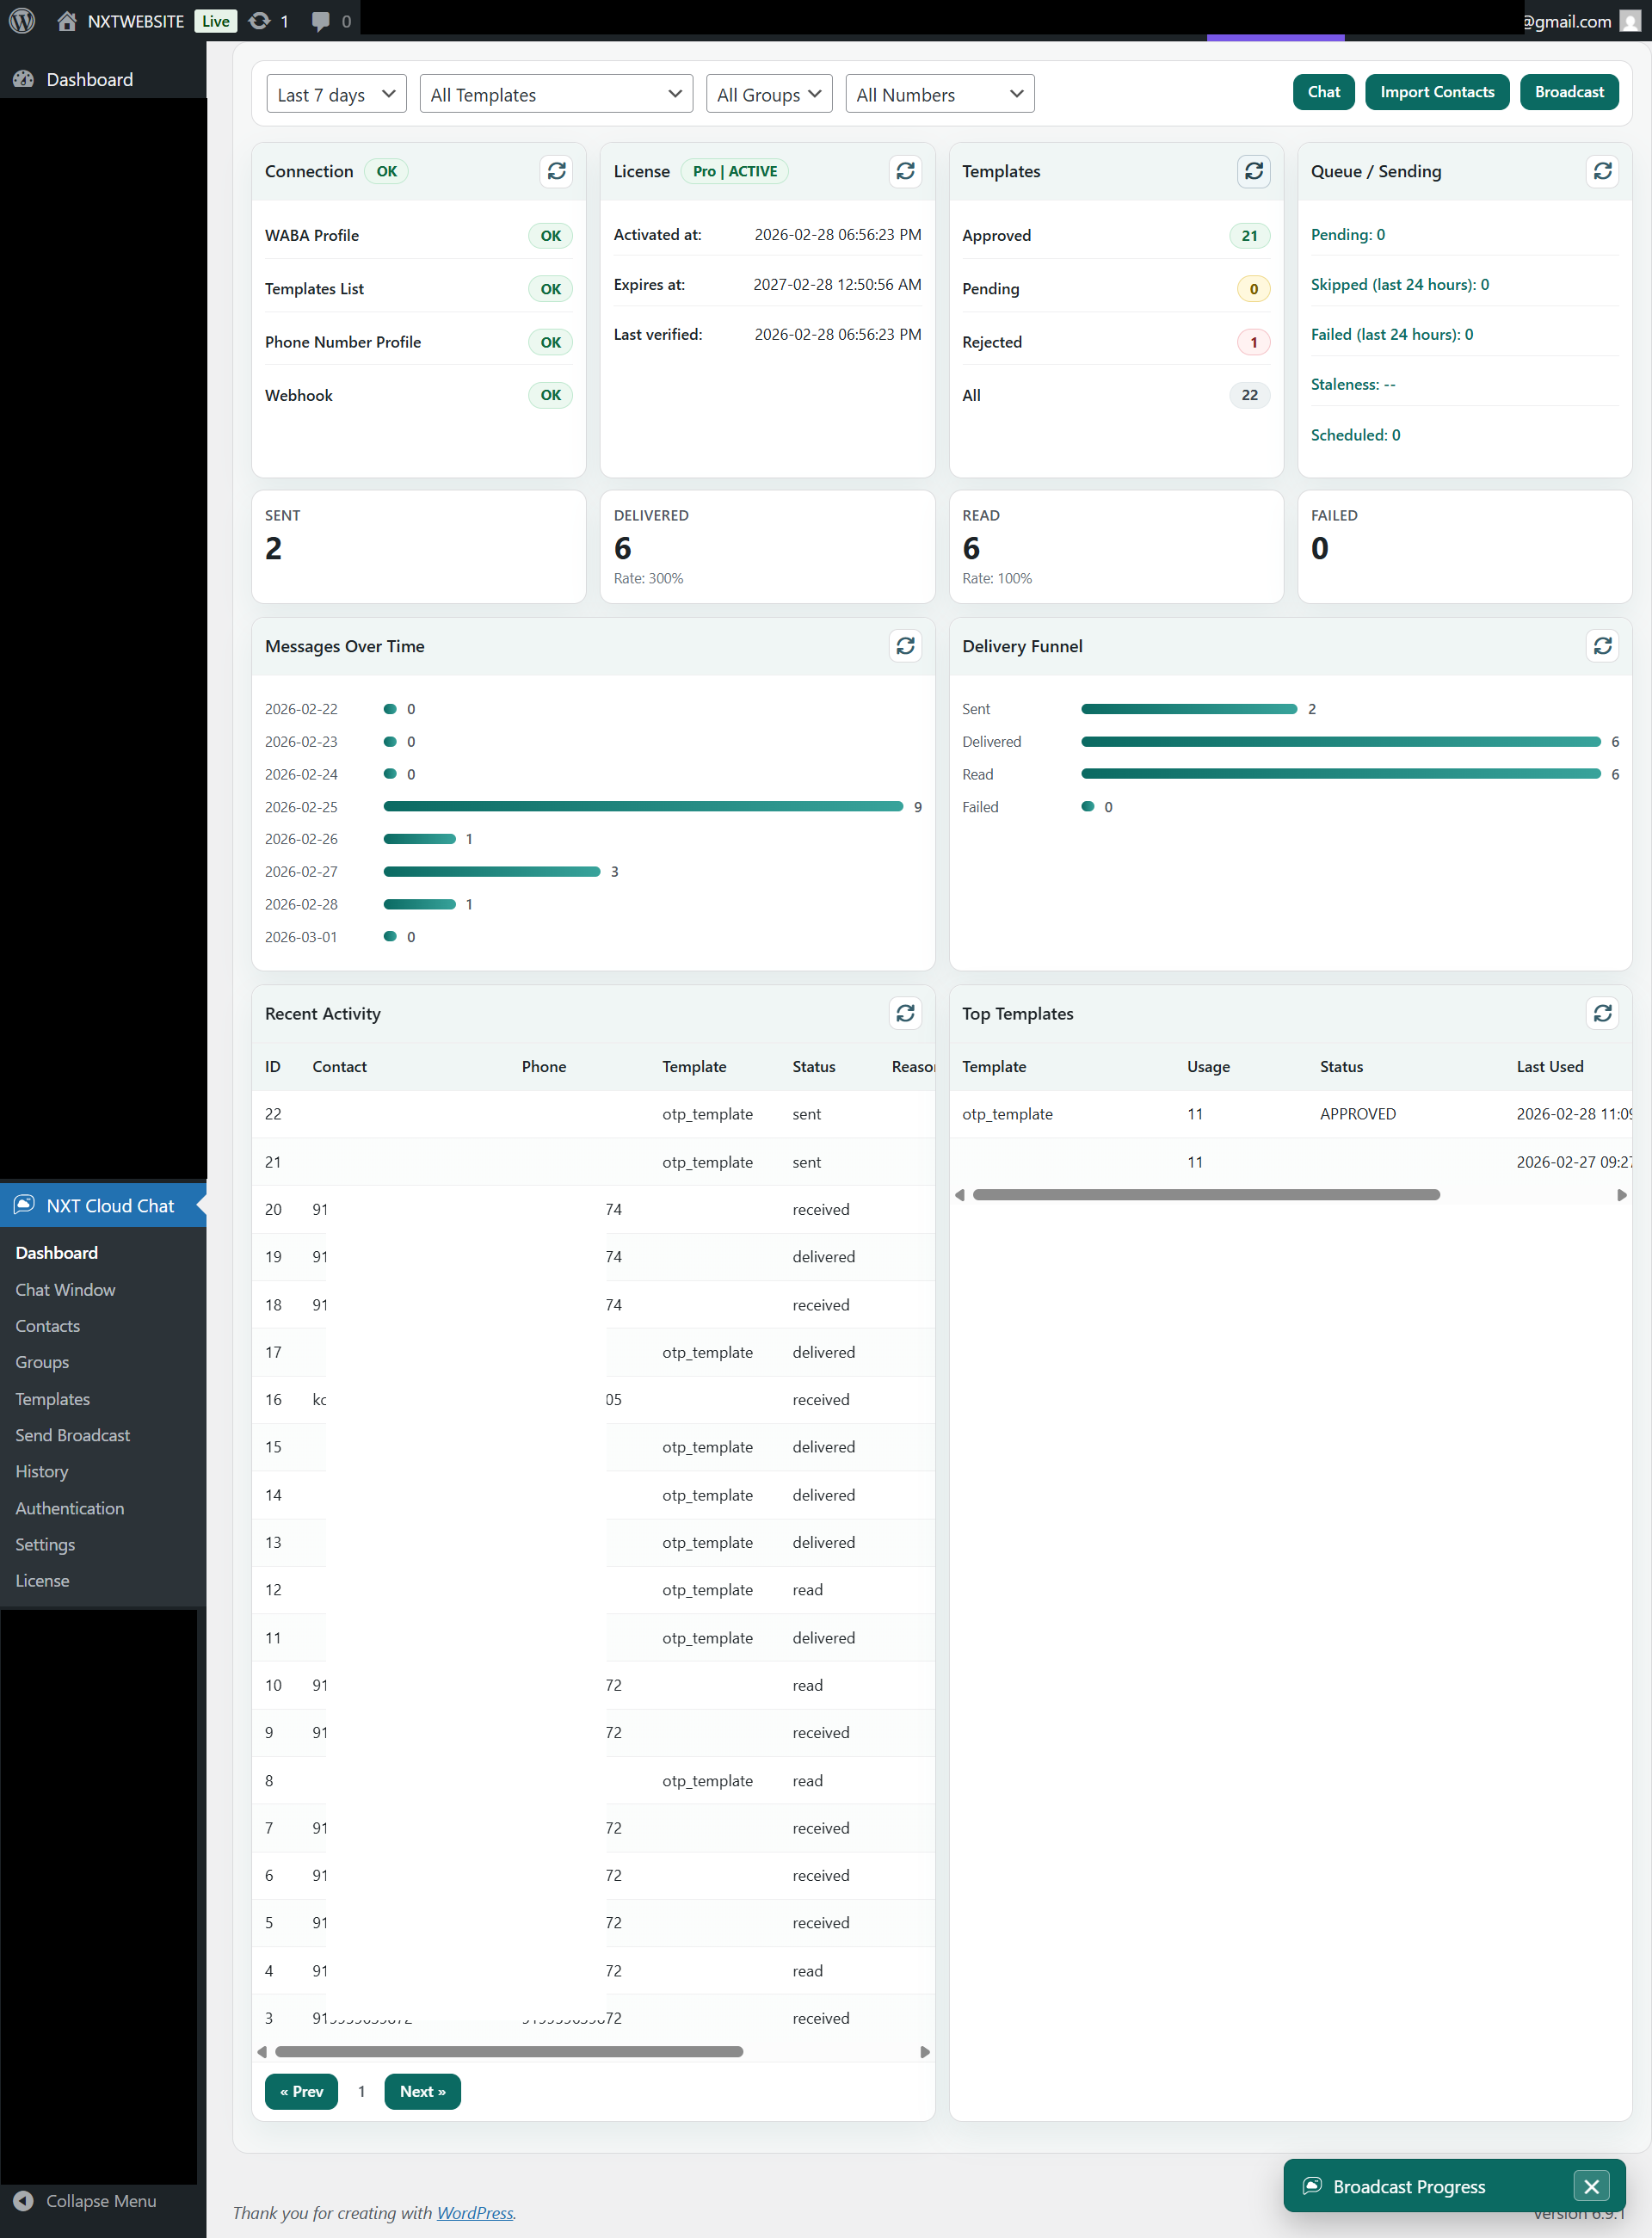
Dashboard
Chat Window
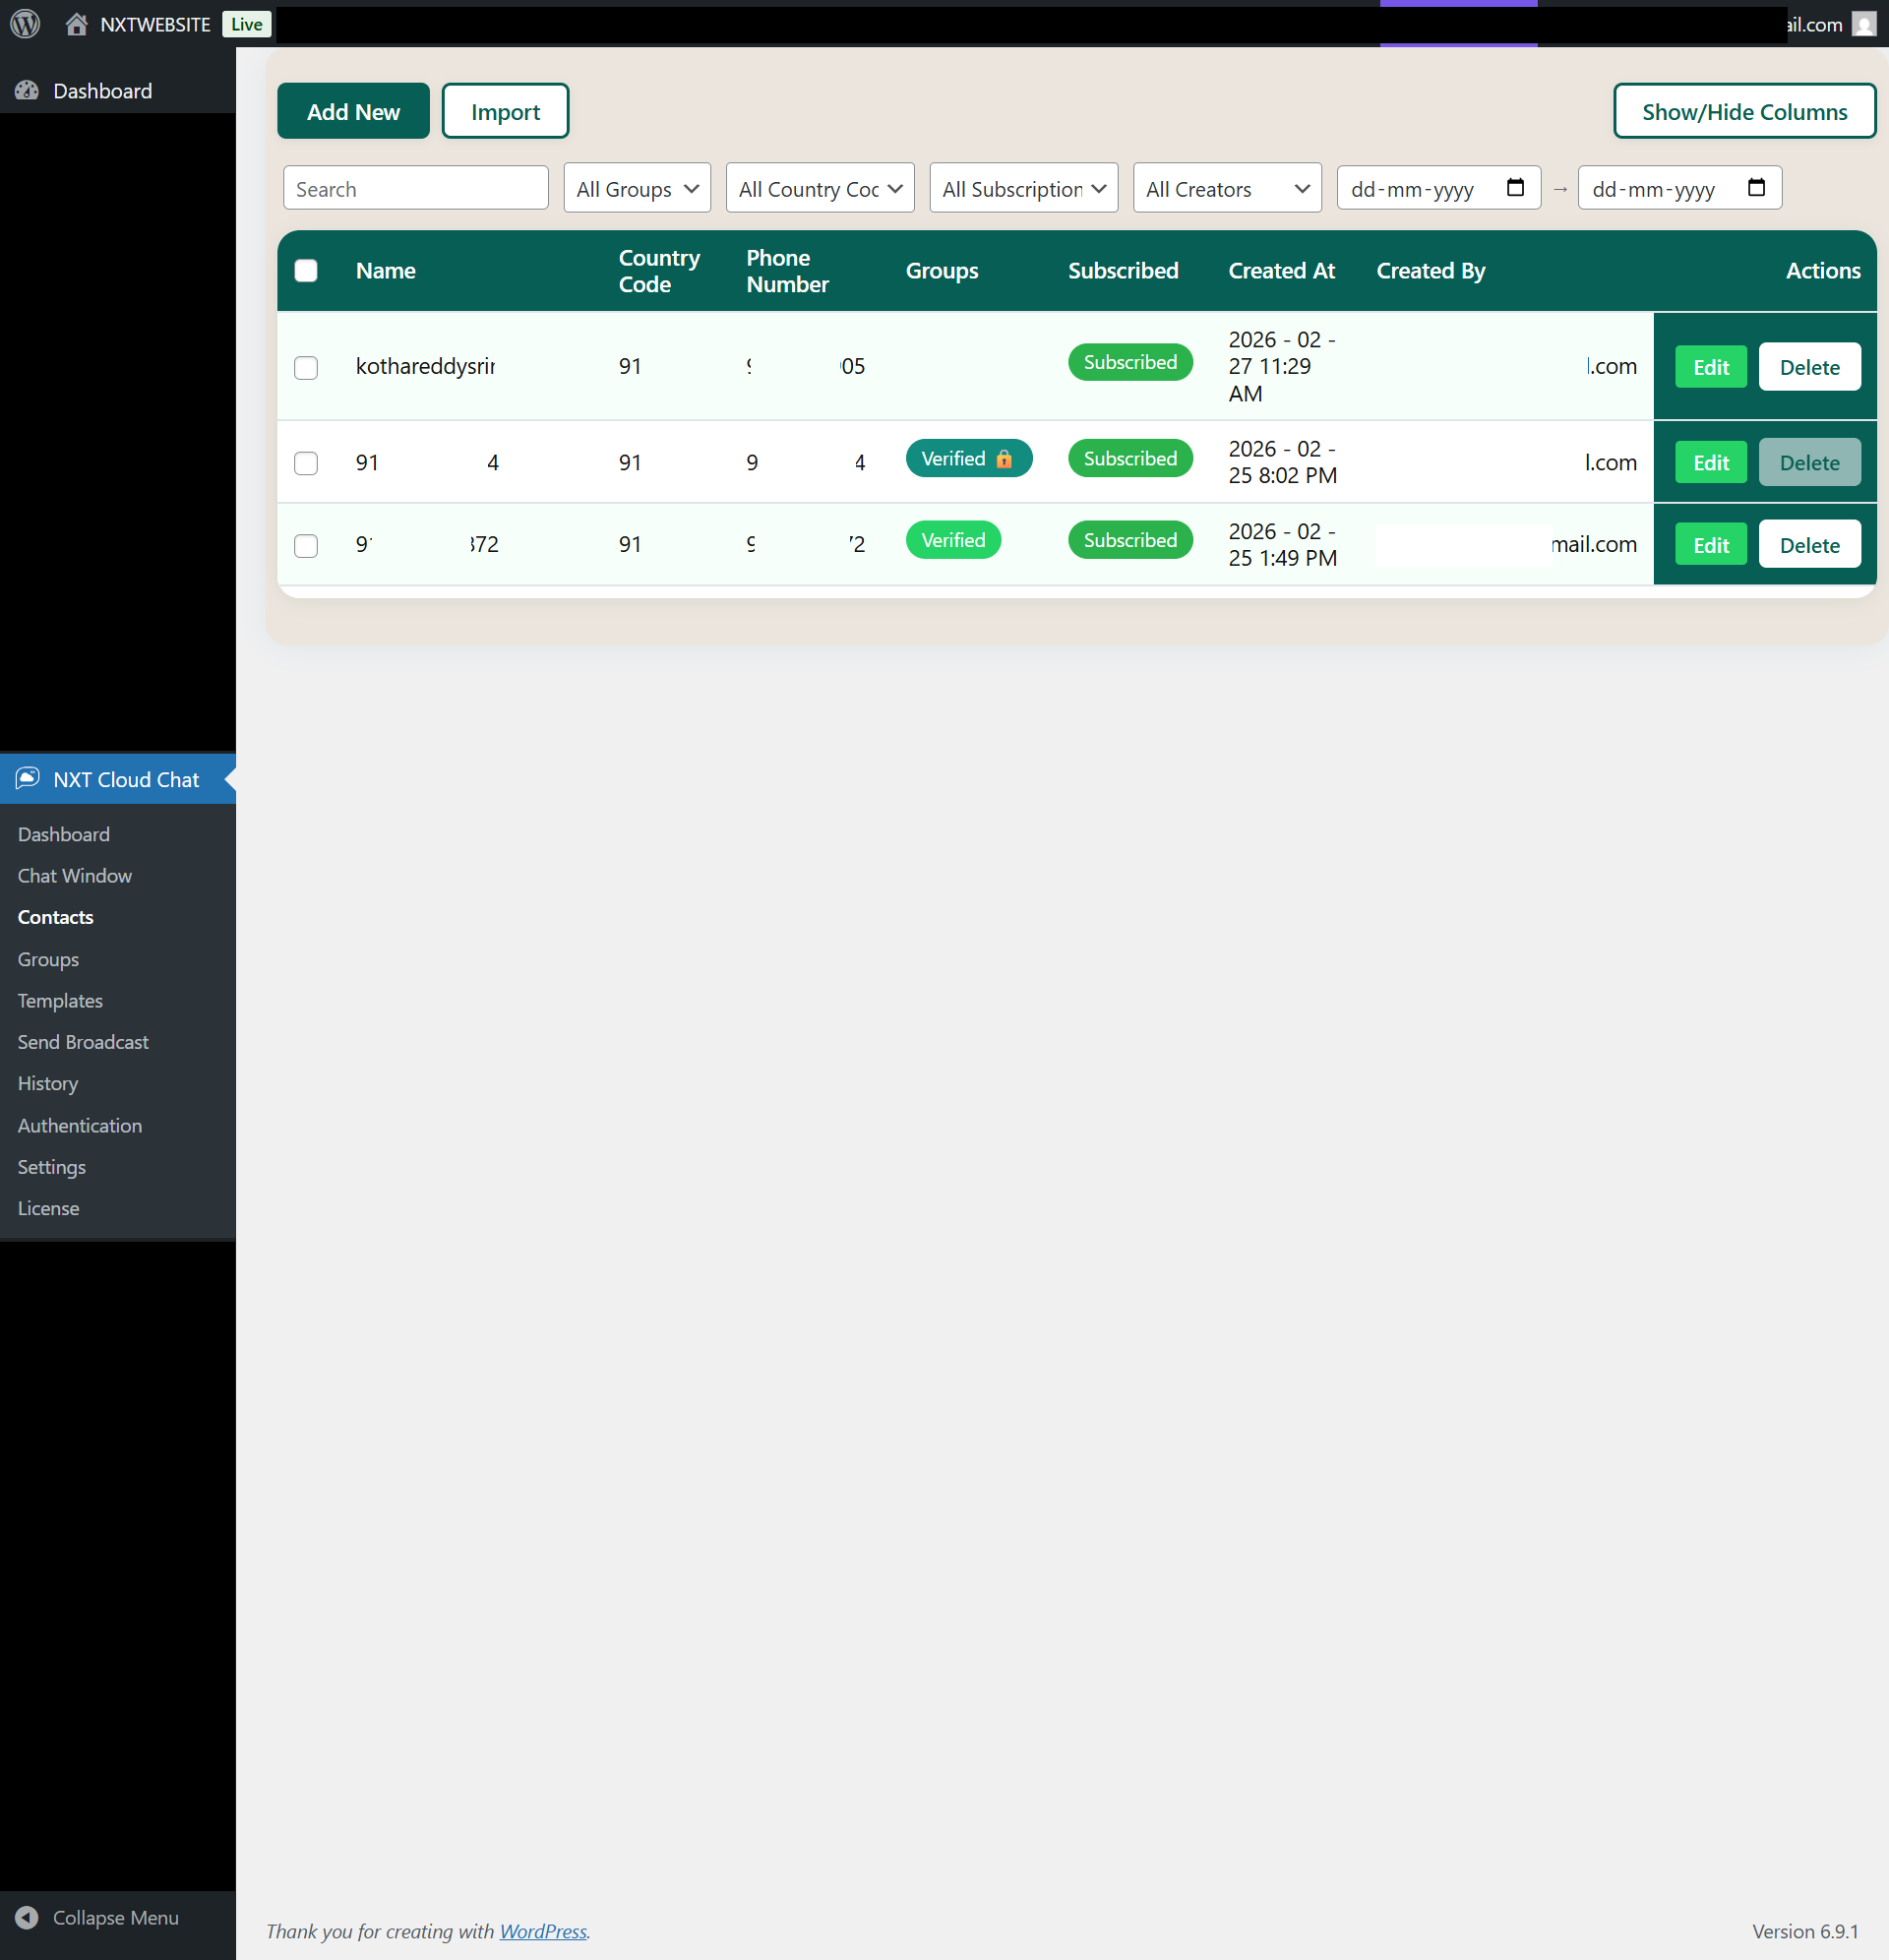
Contacts
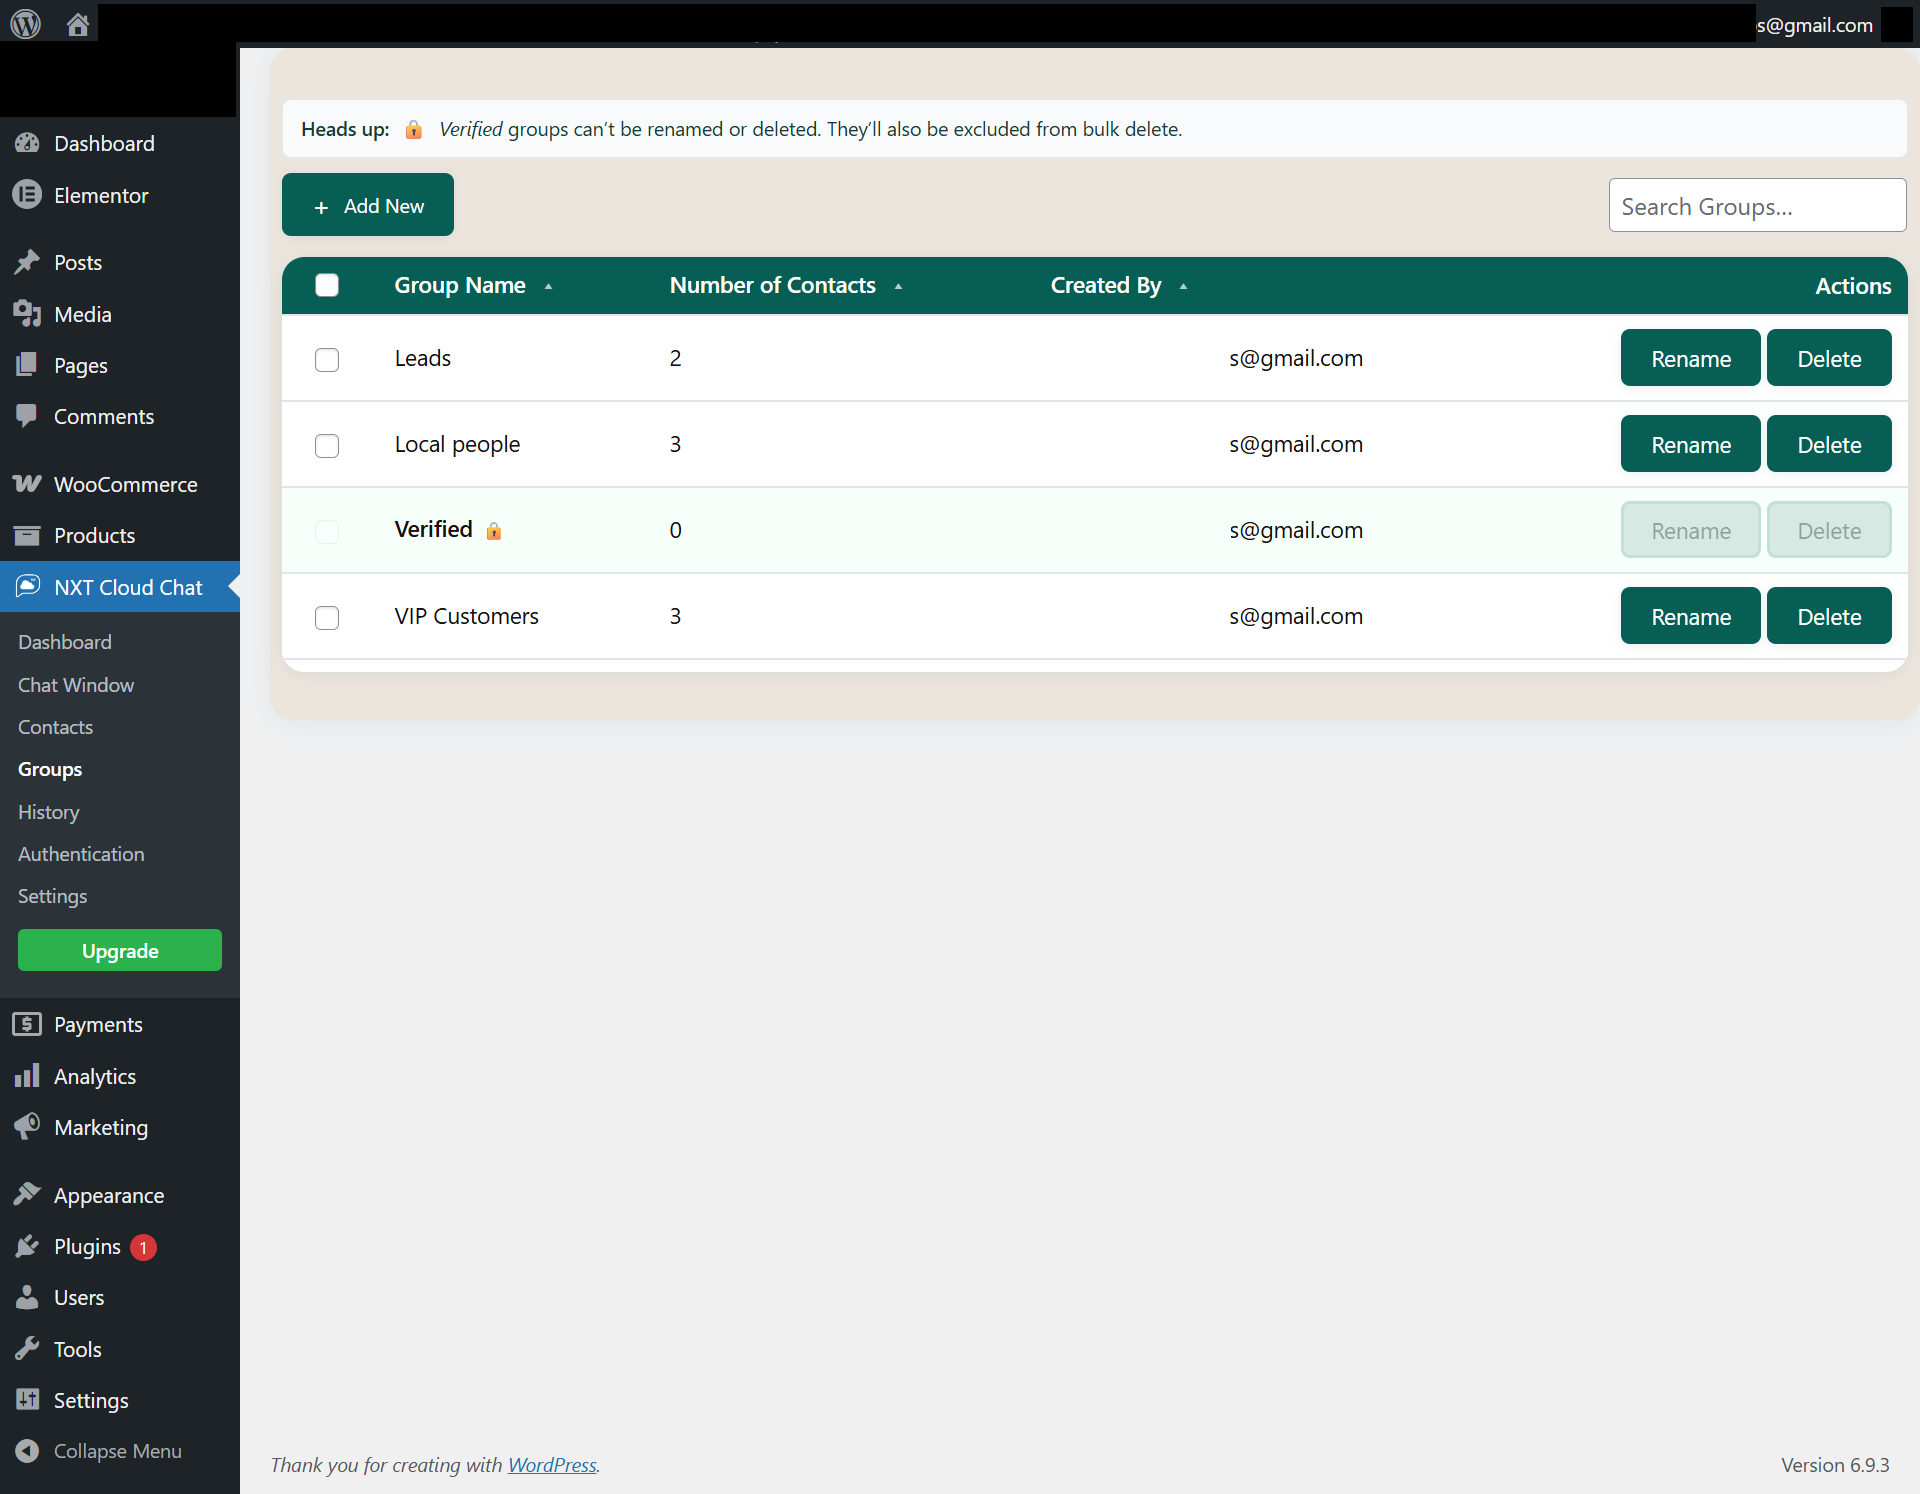
Groups
Templates
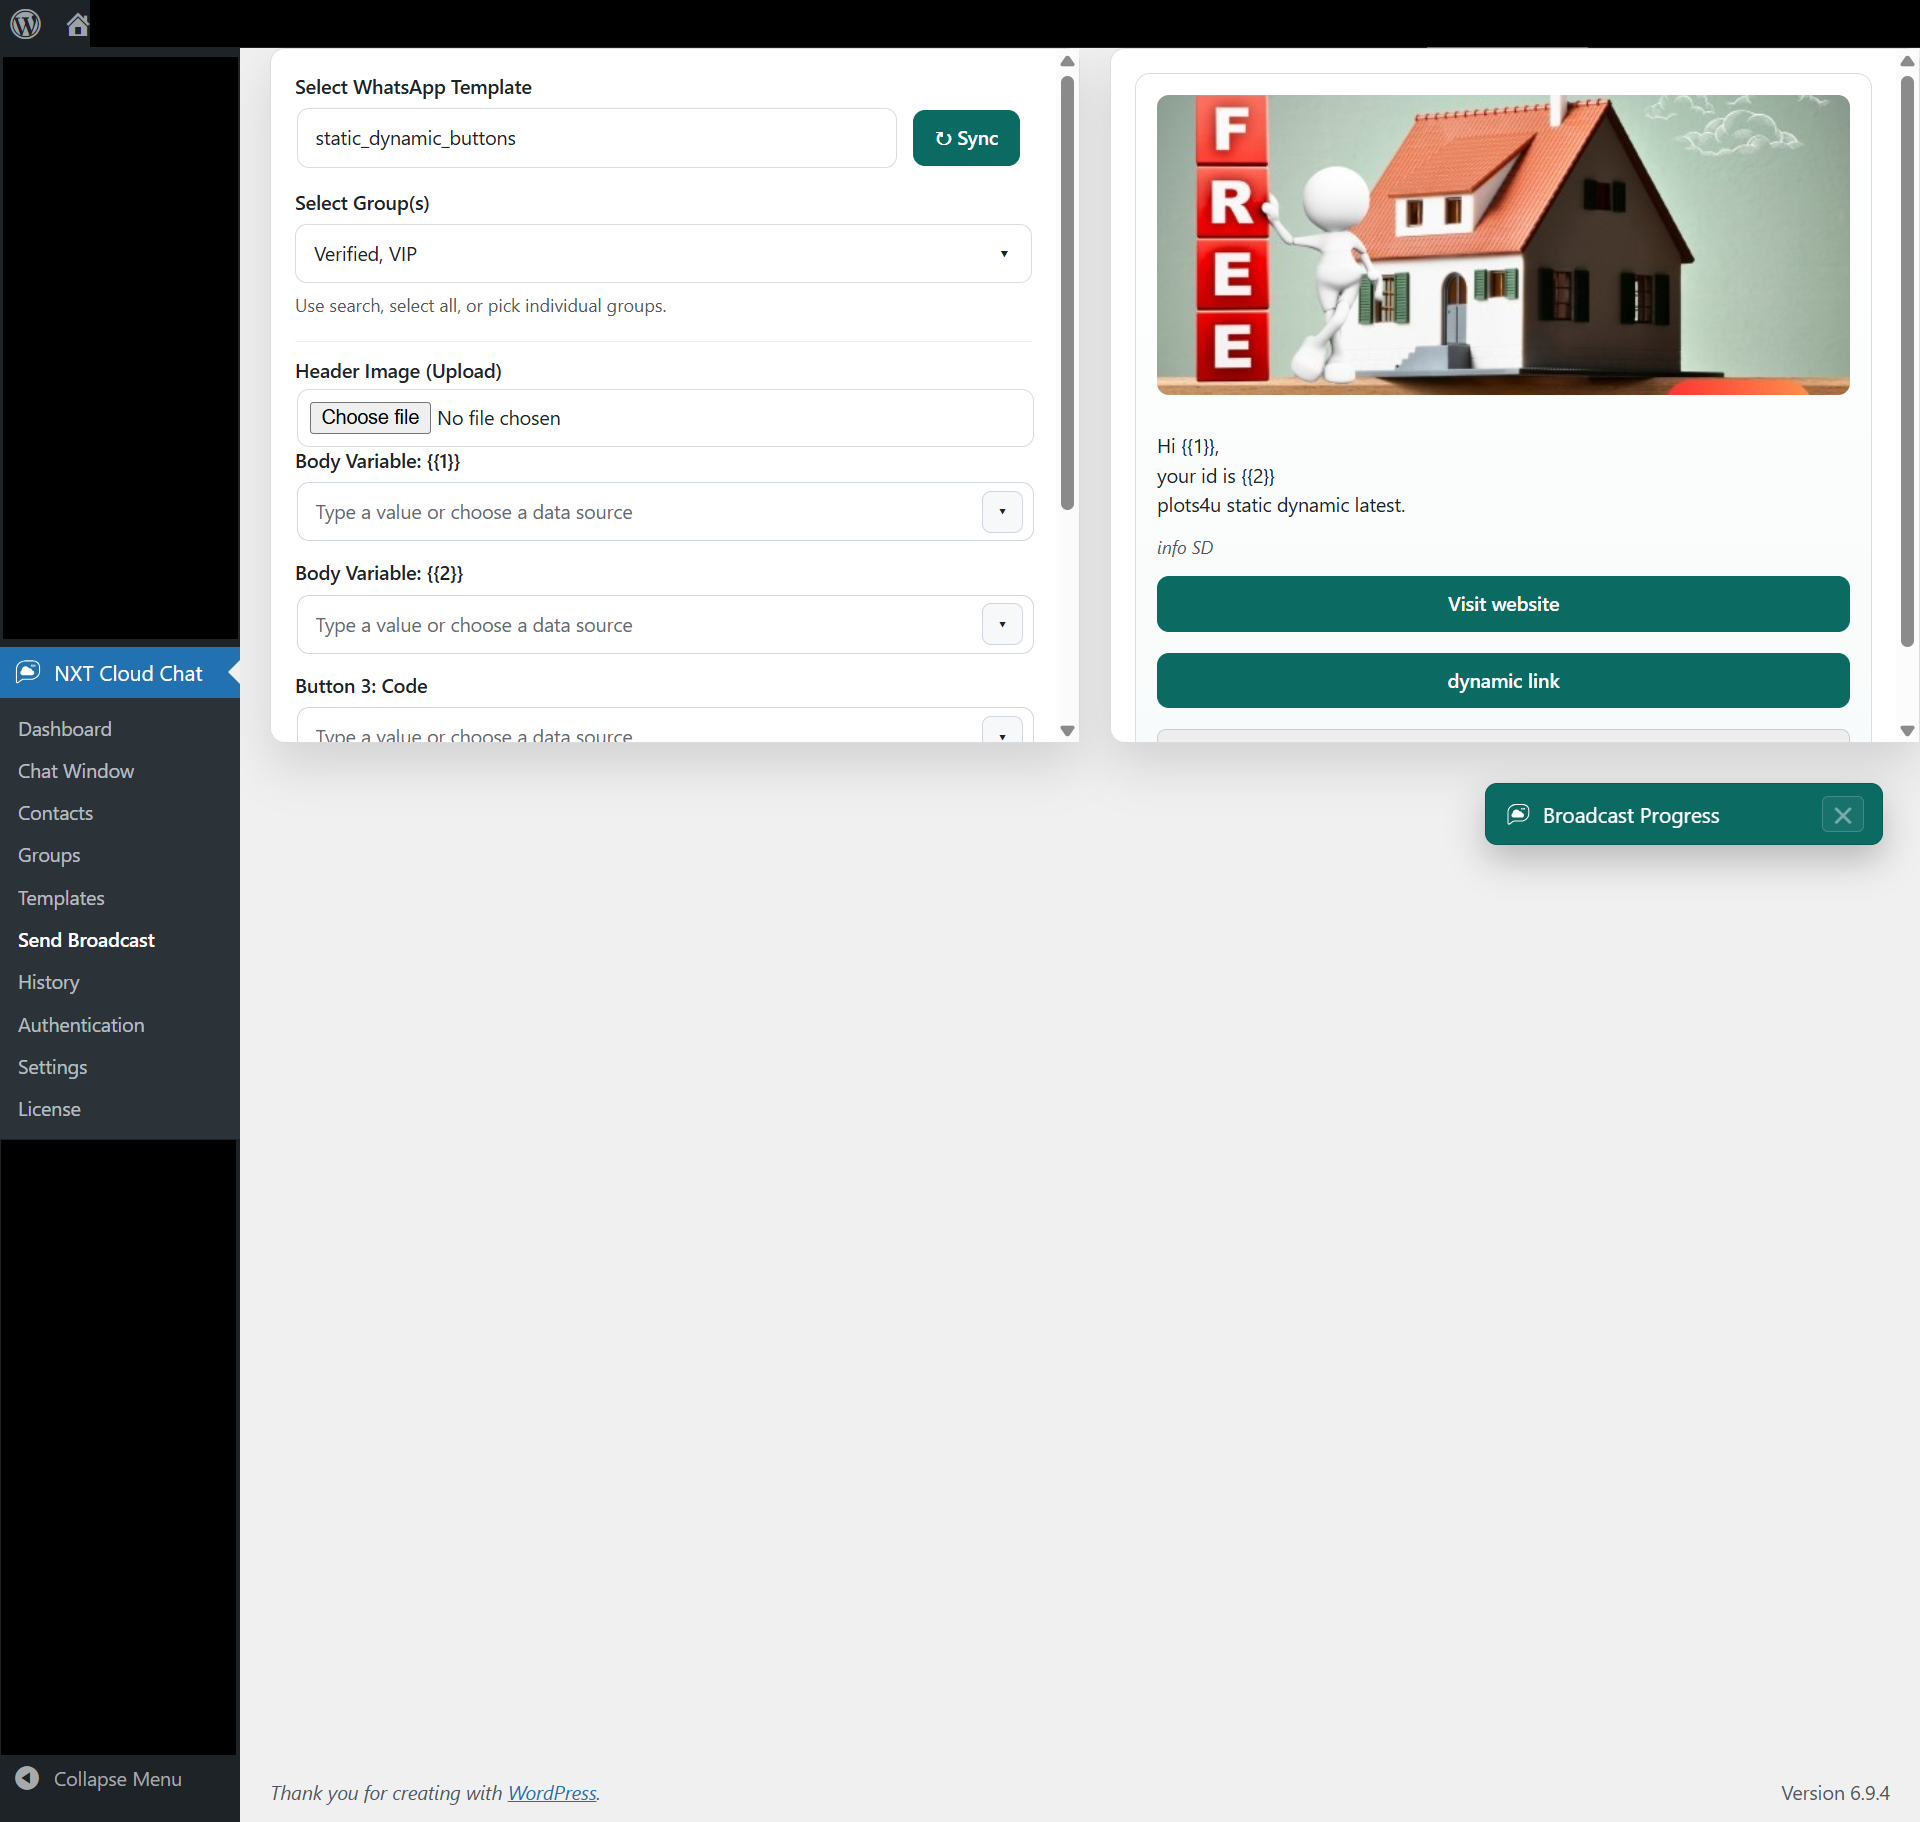
Send Broadcast (Bulk Messages)
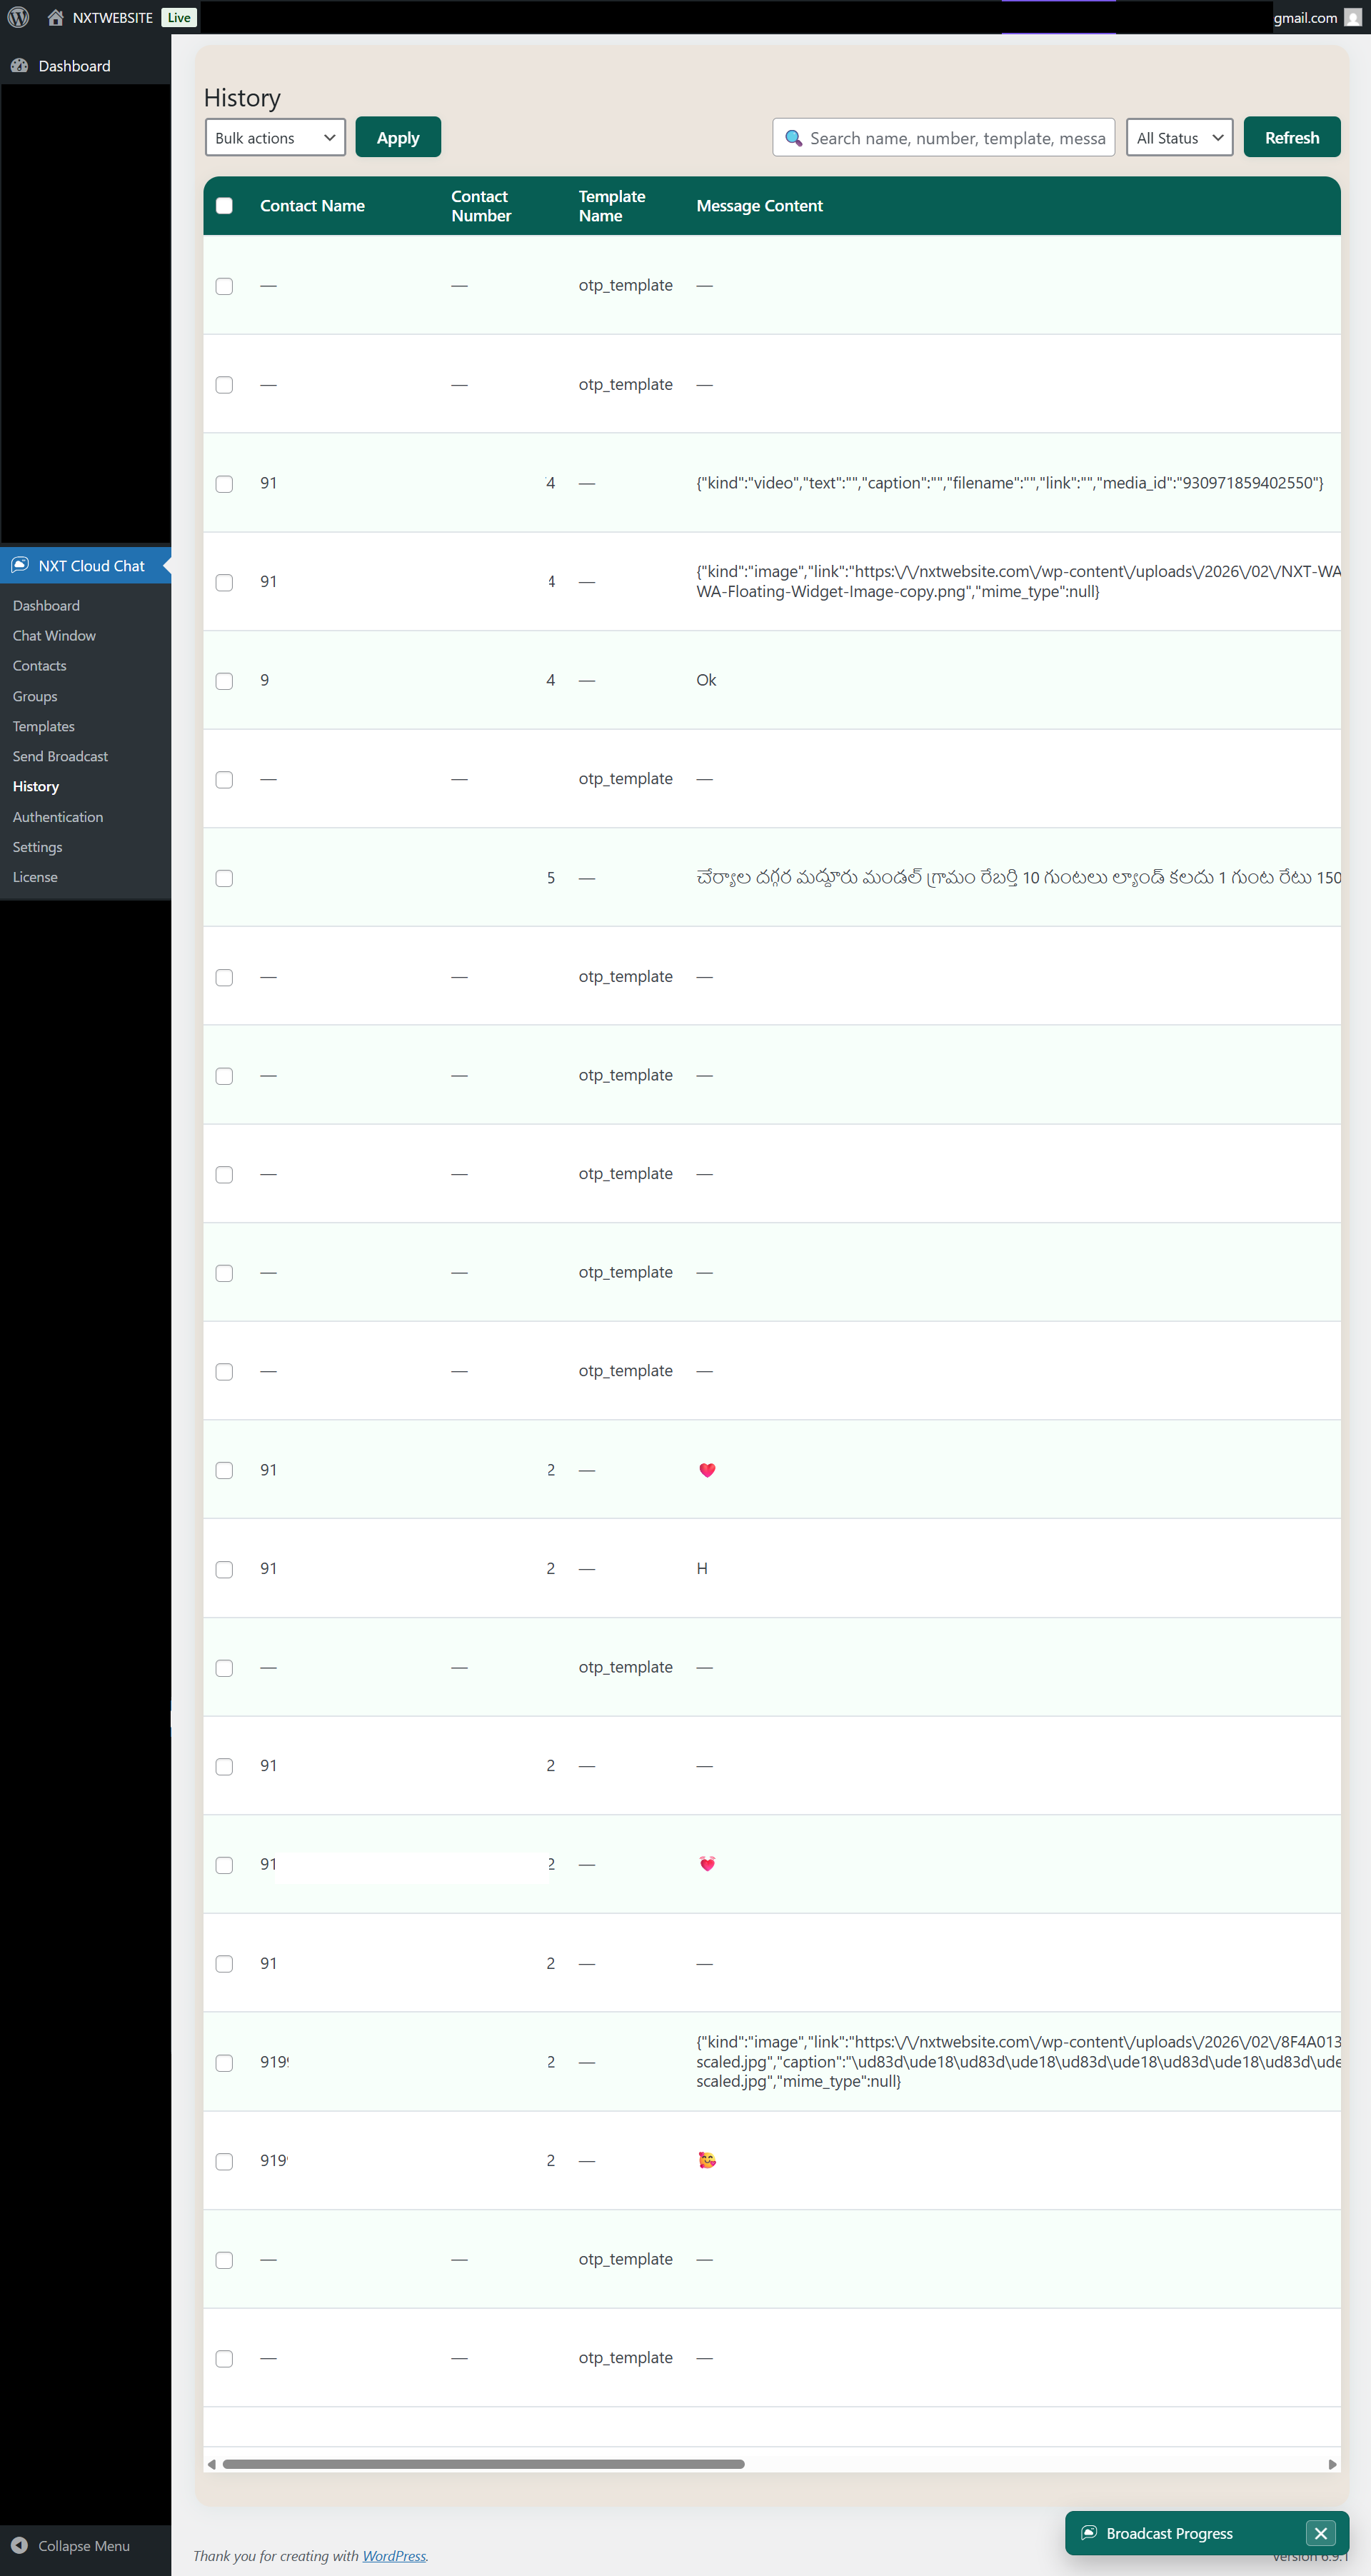
History
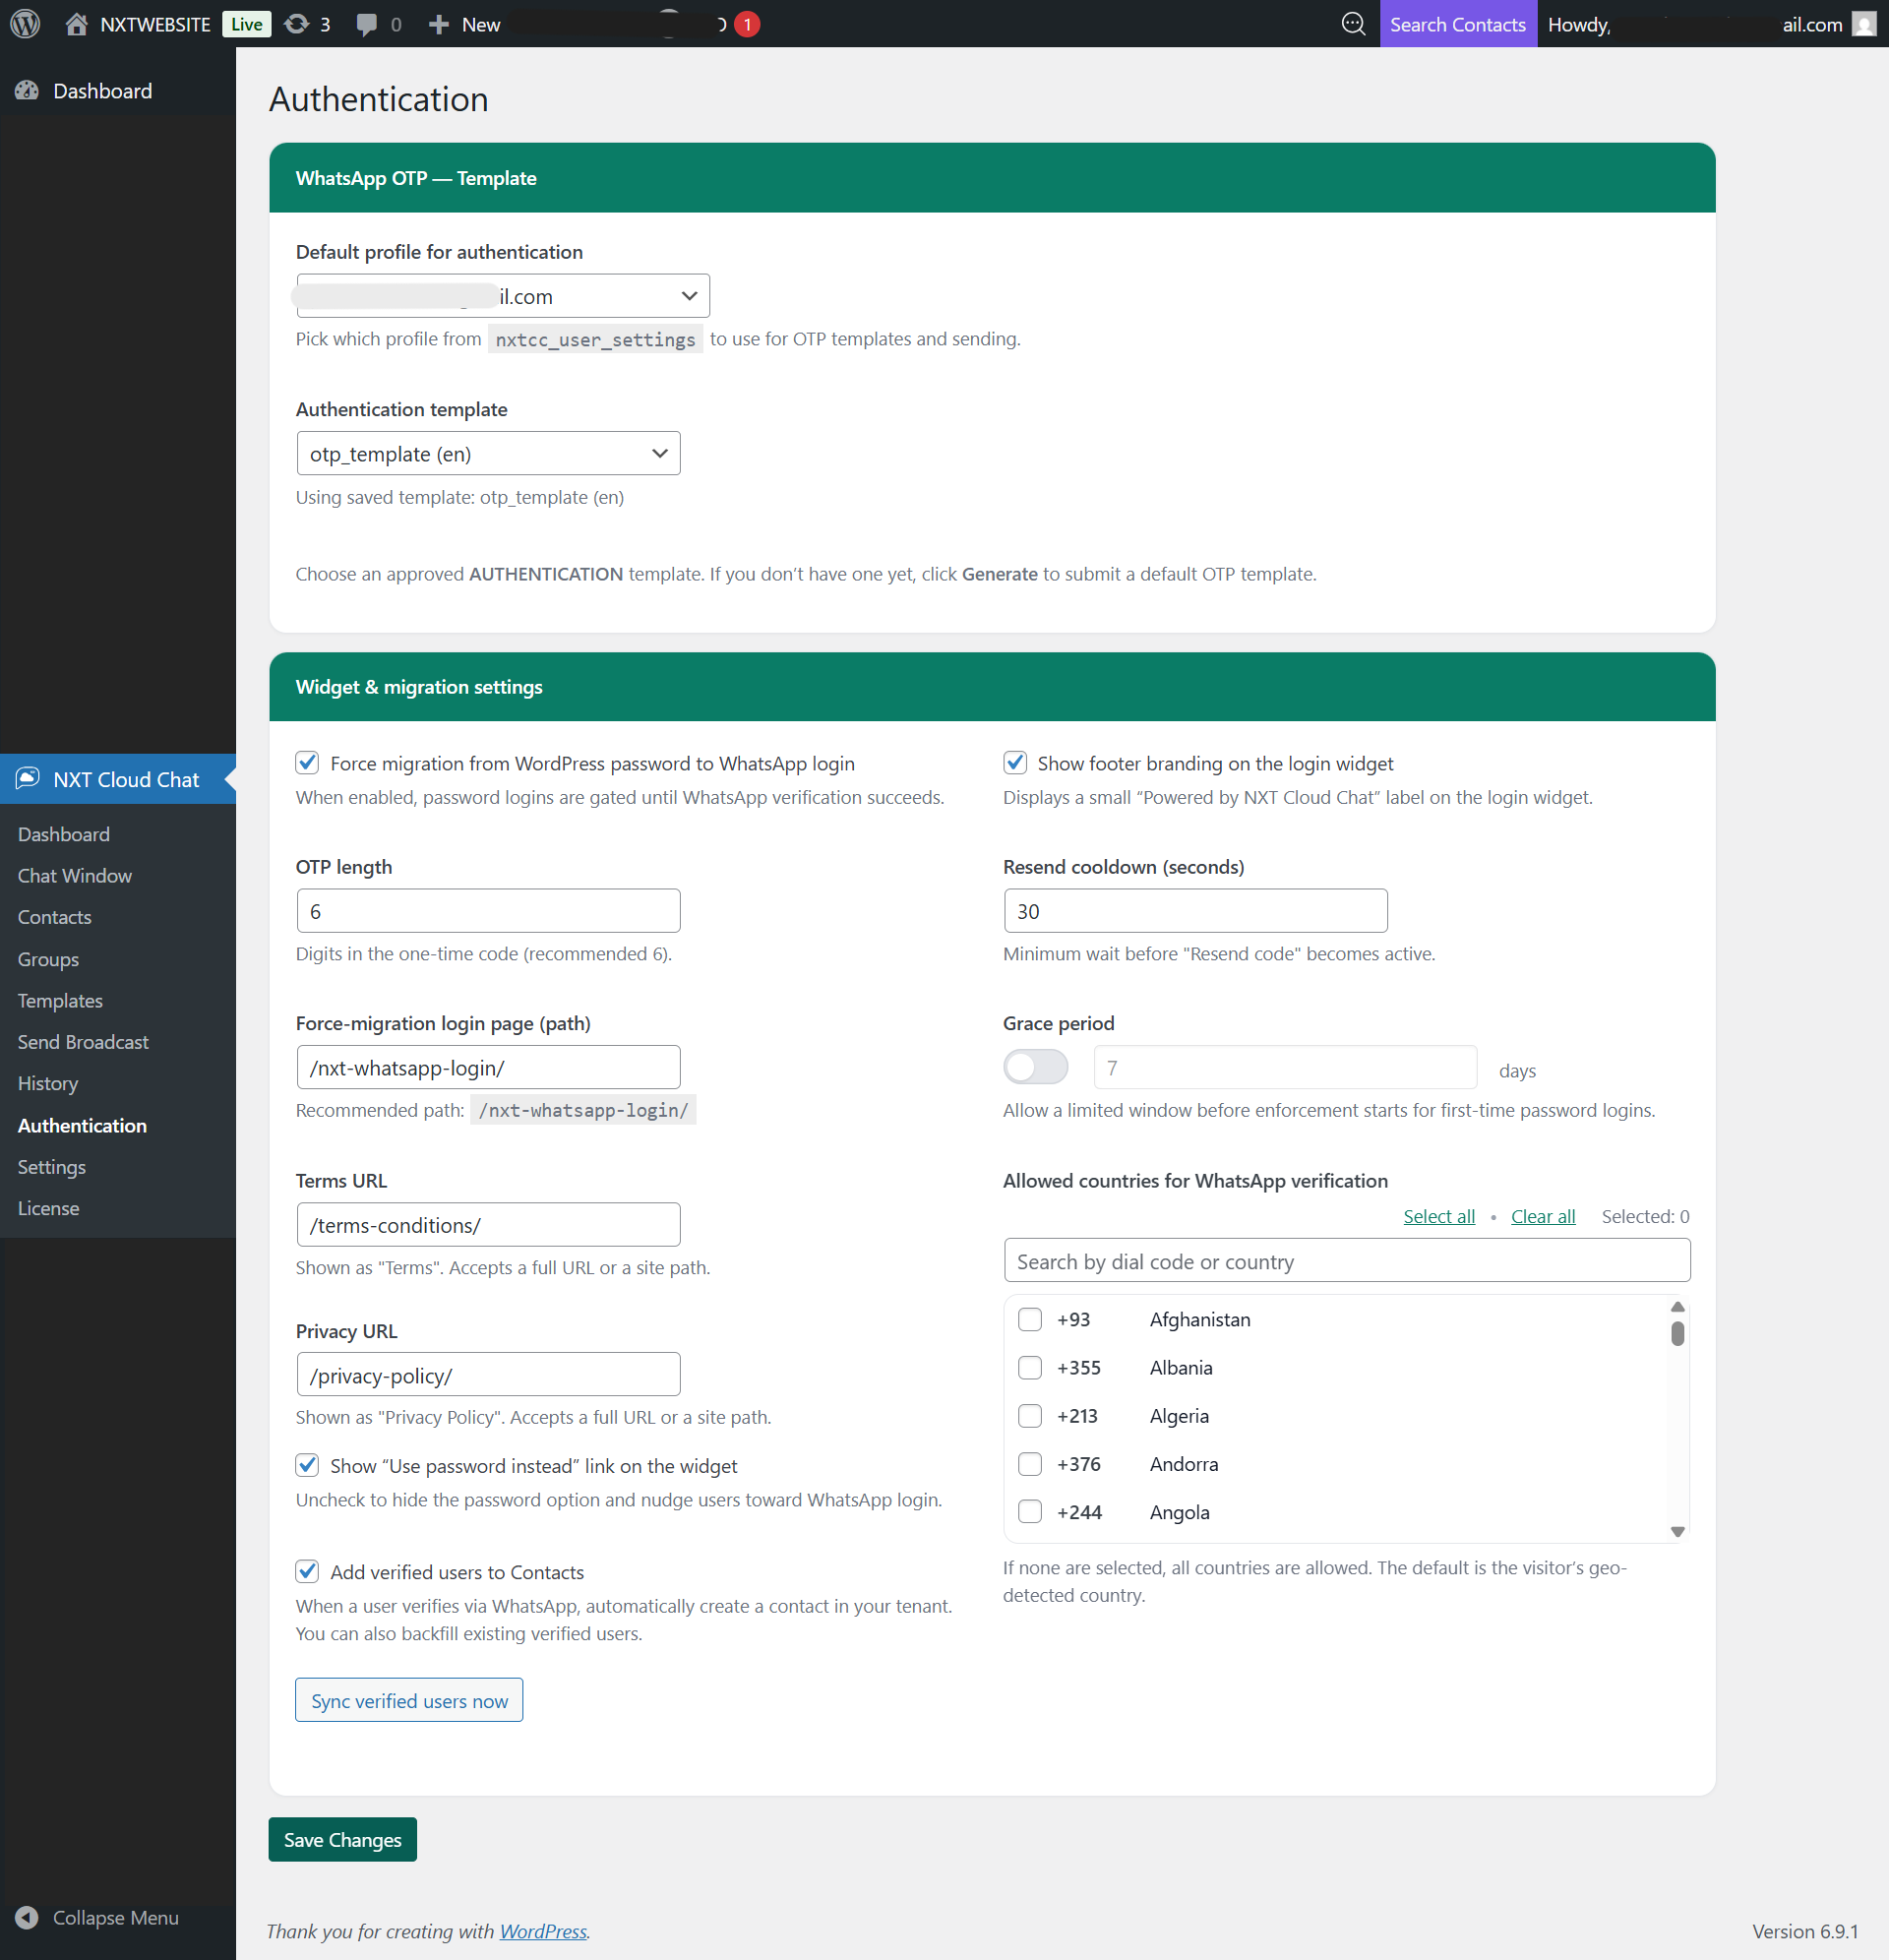
Authentication
Login Widget
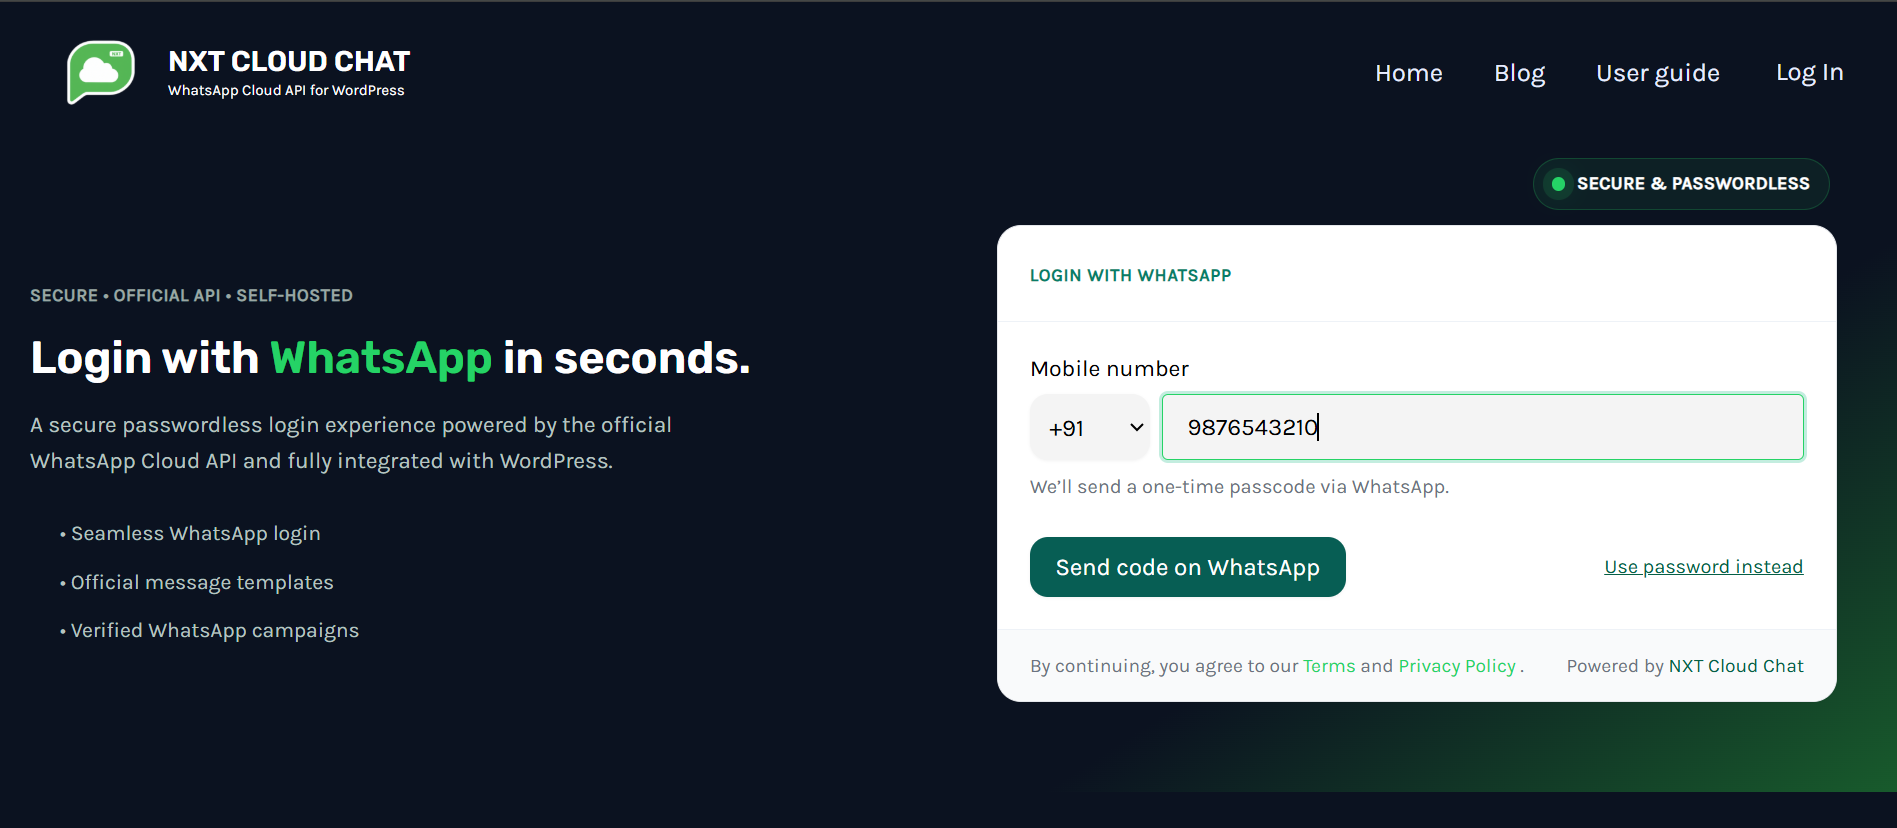
To add WhatsApp login, drag and drop the NXTCC: WhatsApp Login widget into your
login page,
or use shortcode [nxtcc_login_whatsapp].
WhatsApp Login Buttons for WordPress and WooCommerce Login Page
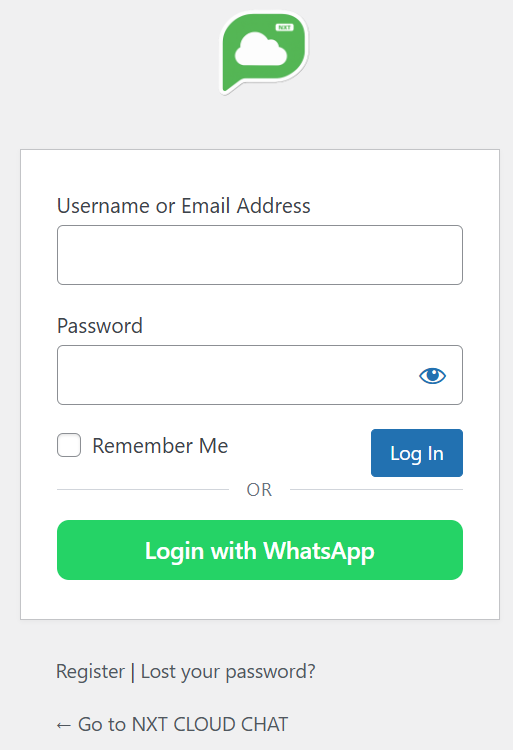
To display WhatsApp login buttons, enable “Show WhatsApp button on WordPress login page” and “Show WhatsApp button on WooCommerce login page” from the Authentication menu
Start Using WhatsApp with WordPress Today
You have now completed the full setup of WhatsApp Cloud API with WordPress using the NXT Cloud Chat plugin. You can start managing conversations, sending templates, and enabling WhatsApp login directly from your WordPress dashboard.